Biology is the scientific study of life and living organisms, exploring their structure, function, growth, evolution, and interactions. It provides essential insights into the natural world and our place within it. Mastering biology requires understanding key concepts, practical applications, and effective study techniques to excel in exams and real-world scenarios. Start by building a strong foundation in fundamental principles and stay curious about the diversity of life on Earth. Active learning, such as summarizing notes and engaging with visual aids, enhances comprehension and retention.
1.1 Key Concepts and Branches of Biology
Biology encompasses various branches, each focusing on different aspects of life; Key areas include cell biology, studying cell structure and function, and genetics, exploring heredity and DNA. Evolutionary biology examines how species change over time, while ecology investigates interactions between organisms and their environments. Molecular biology delves into biological processes at the molecular level, and physiology focuses on how organisms function. Other branches like botany (plant biology), zoology (animal biology), and microbiology (study of microorganisms) provide specialized insights. Understanding these concepts and their interconnections is crucial for mastering biology. Focus on memorizing key terms and practicing conceptual questions to reinforce your knowledge for exams. Regular review and practical applications will help solidify these fundamental ideas.
1.2 Importance of Biology in Everyday Life
Biology plays a vital role in everyday life, influencing fields like medicine, agriculture, and environmental conservation. Understanding biological principles helps address health issues, develop new treatments, and improve food production. It informs personal decisions, such as diet, exercise, and health management. In agriculture, biological knowledge enhances crop yields and pest control, ensuring food security. Ecology and conservation biology guide sustainable practices, protecting ecosystems and biodiversity. Additionally, biotechnology advances industries like pharmaceuticals and bioremediation. Studying biology fosters critical thinking and problem-solving skills, applicable in various careers. By mastering biology, students gain insights into the world around them, empowering them to contribute to societal challenges and innovations. Regularly reviewing practical applications will deepen understanding and preparation for exams.
1.3 Tips for Effective Biology Studying
Mastering biology requires a structured and active approach to learning. Start by identifying key concepts and organizing notes into clear, concise summaries. Use diagrams and visual aids to reinforce complex processes, such as cell structures or ecosystems. Regular review is essential; set aside time daily to revisit material and fill knowledge gaps. Engage with practice questions and past exams to familiarize yourself with common question formats. Flashcards are useful for memorizing terminology and processes; Collaborate with peers or join study groups to discuss challenging topics. Incorporate online resources, such as interactive simulations and video tutorials, to deepen understanding. Stay organized, prioritize weak areas, and maintain a growth mindset to excel in biology exams and beyond.

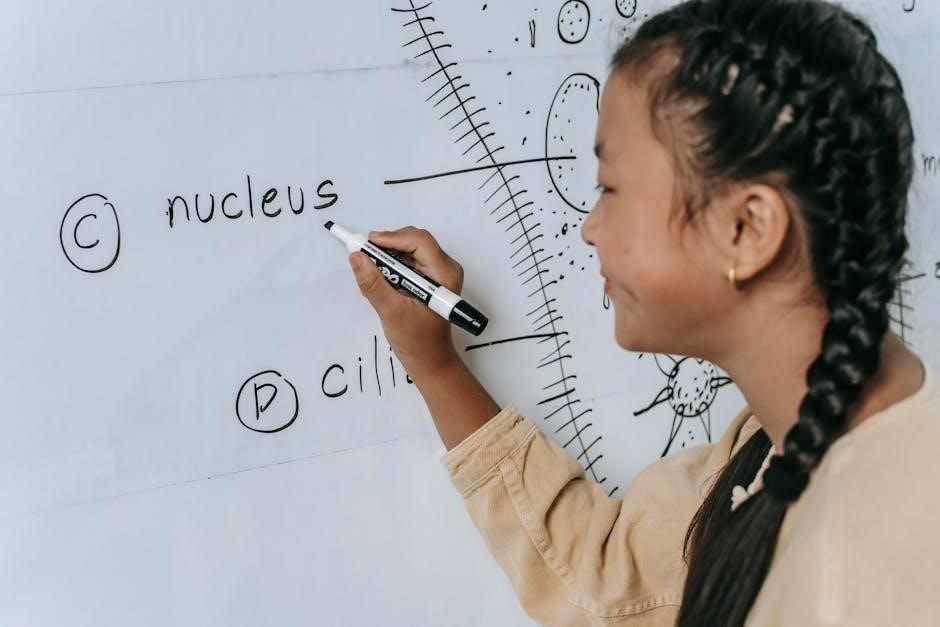
Cell Structure and Function
Cells are the basic units of life, with structures like the cell membrane controlling transport and the nucleus housing genetic material. Organelles such as mitochondria and ribosomes perform essential functions, enabling cellular processes like division, signaling, and energy production. Understanding these components and their interactions is fundamental to biology, as cells form the foundation of all living organisms. This knowledge is crucial for grasping broader biological concepts, from tissue formation to organismal physiology.
2.1 Cell Membrane and Transport
The cell membrane is a selective barrier controlling the movement of substances in and out of the cell. Composed of a phospholipid bilayer, it regulates the passage of ions, nutrients, and waste products through passive and active transport mechanisms. Passive transport, such as diffusion and osmosis, relies on concentration gradients, while active transport requires energy to move substances against these gradients. Vesicle transport, including endocytosis and exocytosis, facilitates the transfer of larger molecules. Understanding these processes is vital for grasping cellular function, as they ensure proper nutrient uptake, waste removal, and maintenance of cellular homeostasis. This knowledge is essential for excelling in biology exams and comprehending life processes at the cellular level.

2.2 Cell Organelles and Their Roles
Cell organelles are specialized structures within cells that perform unique functions essential for cellular survival and activity. The nucleus houses genetic material, regulating gene expression and cell growth. Mitochondria generate energy through ATP production, powering cellular processes. The endoplasmic reticulum synthesizes and transports proteins, while the Golgi apparatus modifies and distributes them. Lysosomes contain digestive enzymes, breaking down waste and foreign substances. Ribosomes produce proteins, serving as the site of translation. Chloroplasts, found in plant cells, conduct photosynthesis, converting light energy into chemical energy. Each organelle contributes to the cell’s overall function, and understanding their roles is crucial for comprehending cellular biology. This knowledge is fundamental for biology exams and provides insights into how cells maintain life and perform specialized tasks efficiently.
2.3 Cell Division: Mitosis and Meiosis
Cell division is a critical biological process that ensures growth, repair, and reproduction. Mitosis results in two genetically identical diploid cells, essential for growth and tissue repair. It consists of four stages: prophase, metaphase, anaphase, and telophase. In contrast, meiosis produces four genetically unique haploid cells, crucial for sexual reproduction. It involves two divisions, reducing chromosome number by half and introducing genetic variation through crossing over and independent assortment. Understanding the differences and roles of mitosis and meiosis is vital for grasping inheritance and cellular biology. Errors in these processes can lead to chromosomal abnormalities and diseases. Studying these mechanisms is fundamental for biology exams, as they underpin genetics, evolution, and human health.
2.4 Cellular Communication and Signaling
Cellular communication is vital for coordinating functions in multicellular organisms. Cells signal through direct contact or chemical messengers, such as hormones, neurotransmitters, and growth factors. Direct signaling involves gap junctions, allowing molecules to pass between cells. Indirect signaling relies on ligands binding to receptors, triggering cascades like the JAK-STAT pathway. Hormones, released into the bloodstream, regulate processes like metabolism and growth. Neurotransmitters enable rapid signaling between neurons and target cells. Growth factors promote cell division and differentiation. Understanding these mechanisms is essential for grasping immune responses, development, and disease. Errors in signaling can lead to conditions like cancer or diabetes. Studying these pathways helps in developing treatments and underscores the complexity of cellular interactions in maintaining life and health.
Genetics and DNA
Genetics explores heredity and variation in organisms, focusing on DNA structure, replication, and gene expression. Understanding Mendelian inheritance, DNA replication, and modern genetic technologies is crucial for biology exams.
3.1 Mendelian Genetics and Inheritance
Mendelian genetics, developed by Gregor Mendel, forms the foundation of modern heredity studies. It focuses on how traits are passed down through generations, emphasizing laws of segregation and independent assortment. Key concepts include dominant and recessive alleles, genotype-to-phenotype relationships, and Punnett squares for predicting trait probabilities. Understanding these principles is vital for analyzing inheritance patterns and solving genetics problems. Students should practice calculating probabilities and interpreting genetic crosses to master this section, ensuring they can apply these laws to various scenarios effectively.
3.2 DNA Structure and Replication
DNA (deoxyribonucleic acid) is a double-stranded helix with nucleotides as its building blocks. Each nucleotide contains a sugar, phosphate, and one of four nitrogenous bases: adenine (A), thymine (T), cytosine (C), and guanine (G), paired as A-T and C-G; DNA replication is semi-conservative, involving the unwinding of strands and synthesis of new complementary strands by DNA polymerase. Understanding replication mechanisms, including replication forks and enzyme functions, is crucial. To master this topic, create detailed diagrams of DNA structure and practice explaining replication steps. Use online resources to visualize 3D models and solve practice questions to reinforce concepts.
3;3 Gene Expression and Mutation
Gene expression involves the translation of genetic information from DNA to proteins, regulating an organism’s traits. It includes transcription, where RNA is synthesized, and translation, where ribosomes assemble proteins. Mutations, or changes in DNA sequence, can alter gene expression, leading to phenotypic changes or disorders. Types of mutations include point mutations, frameshift mutations, and chromosomal mutations. Understanding how mutations affect codons and protein structure is critical. For exam preparation, focus on diagrams of transcription and translation, practice identifying mutation types, and analyze case studies linking mutations to genetic disorders. Use flashcards to memorize key terms and mechanisms, ensuring a solid grasp of these fundamental concepts in genetics.
3.4 Modern Genetic Technologies
Modern genetic technologies have revolutionized biology, enabling precise manipulation and analysis of genetic material. CRISPR-Cas9, a powerful gene-editing tool, allows scientists to modify DNA sequences, offering potential treatments for genetic disorders. DNA sequencing technologies, such as next-generation sequencing, enable rapid identification of genetic mutations and insights into biodiversity. Gene therapy involves introducing healthy genes to replace or repair faulty ones, treating inherited diseases. Additionally, cloning techniques, like PCR and therapeutic cloning, are widely used in research and medicine. For exam success, focus on understanding these technologies, their applications, and ethical implications. Practice analyzing diagrams of CRISPR mechanisms and sequencing processes. Review case studies to see how these technologies solve real-world problems. Mastering these concepts will enhance your grasp of genetics and prepare you for advanced topics.

Evolution and Natural Selection
Evolution explains how species change over time through natural selection, genetic drift, mutation, and gene flow. Study mechanisms, evidence like fossils, and how traits influence survival and reproduction.
4.1 Mechanisms of Evolution
The mechanisms of evolution include natural selection, genetic drift, mutation, and gene flow. Natural selection drives adaptation by favoring traits that enhance survival and reproduction. Genetic drift introduces random changes in allele frequencies, often in small populations. Mutation provides new genetic variation, while gene flow transfers alleles between populations, increasing genetic diversity. These processes collectively shape evolutionary outcomes, influencing speciation and adaptation to environmental pressures. Understanding these mechanisms is crucial for grasping how species evolve over time and respond to ecological challenges. They form the foundation of evolutionary biology, explaining the diversity of life on Earth. Mastering these concepts is essential for success in biology exams and understanding the dynamic nature of life.
4.2 Evidence for Evolution
The evidence for evolution is vast and comes from multiple fields of study. Fossil records show a chronological progression of life forms, with transitional fossils linking different species. Comparative anatomy reveals homologous structures, indicating common ancestry, while molecular biology demonstrates genetic similarities across organisms. Biogeography explains the geographic distribution of species, consistent with evolutionary history. Observable evolutionary changes in natural populations and experiments further validate the theory. Additionally, vestigial structures and embryological similarities provide direct evidence of evolutionary relationships. These diverse lines of evidence collectively support the concept of evolution, offering a comprehensive understanding of how life on Earth has diversified and adapted over time. Studying these evidences is crucial for a deep grasp of biological principles.
4.3 Speciation and Phylogeny

Speciation is the process through which new species emerge, often due to reproductive isolation. This can occur via geographic barriers or genetic drift, leading to distinct species. Phylogeny, the study of evolutionary relationships, is represented through phylogenetic trees, which illustrate how species diverge over time. Molecular data, such as DNA sequences, and shared morphological traits help construct these trees. Understanding speciation and phylogeny is crucial for tracing biodiversity and evolutionary history. These concepts highlight how life adapts and diversifies, forming the framework for modern biological classification systems. Mastering these topics aids in analyzing evolutionary patterns and predicting future divergence events. They are foundational for comprehending the interconnectedness of all living organisms.
4.4 Molecular Evolution and Phylogenetics
Molecular evolution explores how DNA sequences change over time, driven by mutations, natural selection, and genetic drift. These changes shape the genetic diversity of populations and species. Phylogenetics, the study of evolutionary relationships, uses molecular data to reconstruct evolutionary trees, revealing how species are related. Key techniques include maximum parsimony, maximum likelihood, and Bayesian methods, which help infer the most likely evolutionary pathways. Understanding molecular evolution and phylogenetics is essential for tracing the history of life and predicting future evolutionary trends. These fields rely on comparing genetic sequences to identify similarities and differences, making them vital for studying biodiversity and evolutionary adaptations. Mastery of these concepts is crucial for analyzing evolutionary patterns and interpreting genetic data in biological studies.
Ecology and Ecosystems
Ecology studies interactions between organisms and their environment, focusing on energy flow, biogeochemical cycles, and community dynamics. Ecosystems are complex networks where living and non-living components interdepend.
5.1 Ecosystem Components and Energy Flow
Ecosystems consist of biotic (living) and abiotic (non-living) components, interacting to maintain balance. Producers, such as plants, form the base via photosynthesis, converting sunlight into energy. Consumers, like herbivores and carnivores, rely on producers for energy, while decomposers recycle nutrients. Energy flows through ecosystems via food chains and webs, with only 10% transferring between trophic levels. This inefficiency explains the pyramid structure of ecosystems. Understanding these dynamics is crucial for managing ecosystems and addressing human impacts. Key concepts include trophic levels, energy pyramids, and nutrient cycling, all essential for grasping ecological principles and their practical applications in conservation biology.
5.2 Biogeochemical Cycles
Biogeochemical cycles describe the pathways through which essential nutrients circulate between living organisms and the environment. Key cycles include carbon, nitrogen, phosphorus, and water. The carbon cycle involves CO2 absorption by plants and release through respiration and decomposition. Nitrogen fixation converts atmospheric N2 into usable forms, while denitrification returns it to the atmosphere. Phosphorus cycles through soil, water, and organisms, with humans often disrupting it via fertilizers. Water cycles involve evaporation, precipitation, and runoff, sustaining life and ecosystems. These cycles maintain ecological balance and support biodiversity; Understanding them is crucial for addressing environmental challenges like climate change and nutrient pollution. Focus on how human activities alter these cycles for exam questions.
5.3 Population and Community Ecology
Population ecology examines the dynamics of individual species, focusing on growth, density, distribution, and factors influencing these patterns. Key concepts include exponential and logistic growth models, carrying capacity, and limiting factors like resources and predators. Community ecology explores interactions between different species within an ecosystem, such as predation, competition, mutualism, and commensalism. Understanding species diversity, succession, and the balance between cooperation and competition is essential. Additionally, the impact of invasive species and disturbances on community structure is a critical area of study. Analyzing these interactions helps predict how ecosystems respond to environmental changes. For exams, focus on identifying factors affecting population growth and explaining how communities maintain stability or shift over time. These principles are vital for conservation and ecosystem management strategies.
5.4 Conservation Biology and Human Impact
Conservation biology focuses on preserving biodiversity and addressing threats to ecosystems caused by human activities. Key topics include habitat destruction, climate change, pollution, and overexploitation of resources. Understanding the impact of invasive species and human-induced disruptions is crucial. Strategies such as habitat restoration, species reintroduction, and the establishment of protected areas are essential for maintaining biodiversity. Additionally, the role of human behavior and policy in conservation efforts cannot be overlooked. Students should analyze case studies of successful conservation programs and the challenges they face. This section emphasizes the importance of sustainability and the ethical responsibility to protect ecosystems for future generations. Mastery of these concepts is vital for addressing global environmental challenges effectively.

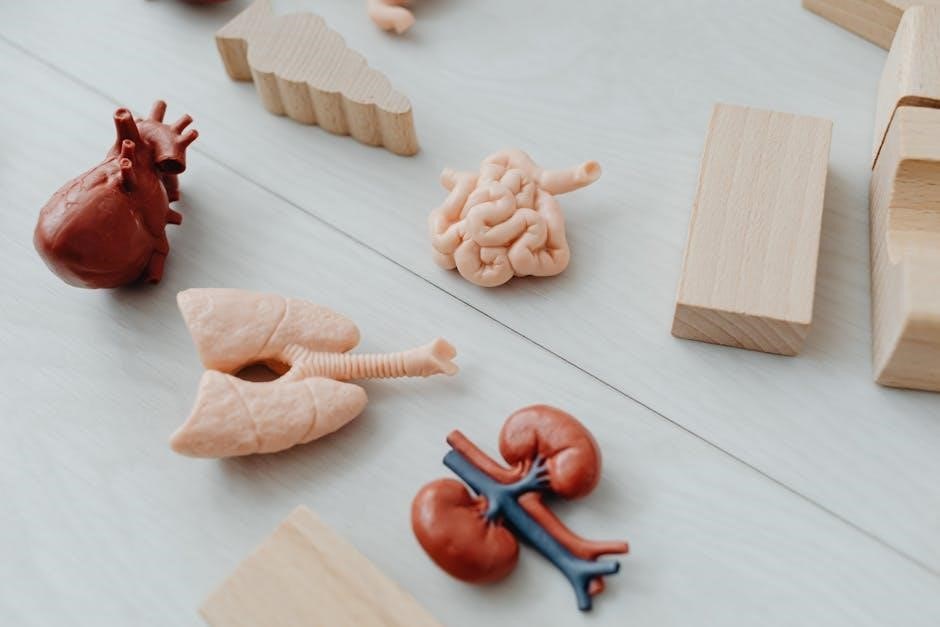
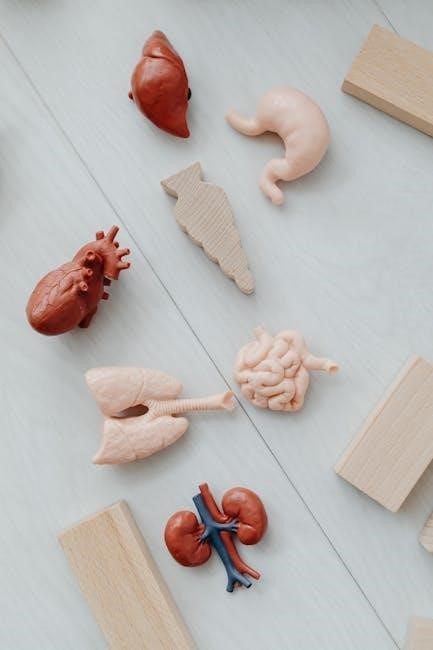
Human Physiology and Anatomy
Human physiology and anatomy explore the structure and function of the human body. Understanding how systems like the skeletal, muscular, and nervous systems interact is crucial for clinical applications and overall health comprehension. This section emphasizes the importance of recognizing how bodily functions maintain homeostasis and respond to external changes, essential for biology exams and real-world medical applications.
6.1 Nervous and Circulatory Systems
The nervous system, comprising the central and peripheral systems, facilitates communication through electrical and chemical signals. It enables responses to stimuli, regulates body functions, and supports cognitive processes like memory and learning. The circulatory system, including the heart, blood, and blood vessels, transports oxygen, nutrients, and hormones to cells while removing waste products. Both systems are vital for maintaining homeostasis and overall health. Understanding their structures and functions is crucial for biology exams, as they often appear in questions related to human physiology. Effective study techniques, such as creating detailed diagrams and flashcards, can help students master these complex topics. Regular practice with past exam questions also enhances retention and exam performance.
6.2 Respiratory and Digestive Systems
The respiratory system, including the nose, trachea, and lungs, is responsible for exchanging oxygen and carbon dioxide through breathing. It works closely with the circulatory system to deliver oxygen to cells. The digestive system, involving the mouth, esophagus, stomach, and intestines, breaks down food into nutrients for absorption and energy production. Both systems are essential for sustaining life and maintaining bodily functions. To excel in exams, students should focus on understanding the structures, processes, and interactions between these systems. Visual aids like diagrams and flowcharts can enhance comprehension. Regularly reviewing notes and practicing with past exam questions will also reinforce knowledge and improve retention of these critical biological processes.
6.3 Endocrine and Muscular Systems
The endocrine system regulates bodily functions through hormones, with glands like the pancreas, thyroid, and adrenal glands playing key roles. Hormones control metabolism, growth, and reproductive processes. The muscular system enables movement, supports posture, and facilitates bodily functions like circulation and digestion. Understanding the interaction between these systems is crucial, as hormones often influence muscle activity. For exam success, students should master the functions of major endocrine glands and muscle types, as well as their roles in maintaining homeostasis. Utilizing flashcards for key terms and engaging in active recall can enhance learning. Additionally, practicing with past exam questions targeting these systems will help build confidence and improve test performance.
6.4 Immune System and Disease Defense
The immune system is the body’s defense mechanism against pathogens, such as bacteria, viruses, and fungi. It consists of two main responses: the innate immune system, which provides immediate, non-specific defense, and the adaptive immune system, which offers specific, long-lasting protection. Key components include white blood cells, antibodies, and lymph nodes. Understanding how these elements work together to identify and neutralize threats is essential for exam success. Additionally, studying common immune disorders, such as autoimmune diseases and immunodeficiencies, will help students grasp the system’s complexity. Focusing on the roles of B cells, T cells, and macrophages, as well as the process of vaccination, will enhance preparation for related exam questions.

Study Strategies and Exam Preparation
Effective study strategies include creating detailed schedules, using flashcards for key terms, and practicing past exam questions to identify weak areas. Stay organized and review consistently to build confidence and mastery of biology concepts.
7.1 Time Management and Study Schedules
Effective time management is crucial for success in biology exams. Create a detailed study schedule, allocating specific time blocks for each topic based on difficulty and importance. Prioritize challenging concepts and review them regularly. Break study sessions into manageable intervals, such as 45-minute focused periods followed by short breaks, to maintain productivity. Avoid cramming by spreading study material evenly over weeks or months. Use calendars or planners to track progress and set achievable goals. Eliminate distractions during study time, such as turning off notifications, to maximize efficiency. Stay flexible to adjust schedules as needed, ensuring consistent review and practice. A well-organized plan helps reduce stress and enhances retention of biological concepts.
7.2 Active Learning Techniques
Active learning involves engaging with material through hands-on activities and critical thinking. Summarize notes in your own words, focusing on key concepts. Self-quizzing and flashcards help reinforce memory. Teach the material to someone else to deepen understanding. Use concept maps or diagrams to visualize relationships between ideas. Engage in group discussions to explore complex topics from different perspectives. Apply biological concepts to real-world scenarios or lab experiments to enhance practical understanding. Regularly reflect on what you’ve learned and identify areas needing improvement. By actively participating in the learning process, you’ll retain information more effectively and develop a stronger grasp of biological principles. These techniques foster engagement and make studying more dynamic and impactful.
7.3 Practicing with Past Exam Questions
Practicing with past exam questions is a highly effective way to prepare for biology finals. It familiarizes you with common question formats, such as multiple-choice, short-answer, and essay questions. Reviewing past papers helps identify recurring themes and topics, allowing you to focus your study efforts. Answering questions under timed conditions simulates exam pressure, improving time management and reducing anxiety. Use a study guide to clarify concepts and address weaknesses. Analyze incorrect answers to understand common mistakes and avoid repeating them. This method not only reinforces knowledge but also enhances problem-solving skills and exam strategy. Regular practice builds confidence and ensures readiness for the actual test, making it a cornerstone of successful exam preparation.
7.4 Using Flashcards and Memory Aids
Flashcards and memory aids are excellent tools for biology exam preparation, helping to reinforce key terms, concepts, and processes. Create flashcards with clear, concise information, focusing on difficult topics like cellular structures or genetic terms. Use mnemonics or acronyms to remember complex sequences or processes, such as the stages of mitosis or the steps of photosynthesis. Diagrams and concept maps can also serve as visual memory aids, making abstract ideas easier to retain. Review flashcards regularly, testing yourself on definitions and explanations. This active recall strengthens memory and identifies areas needing further study. Combining flashcards with other techniques, like summarizing notes, enhances retention and ensures a deeper understanding of biology concepts for exam success.