Month: May 2024

capsule wardrobe checklist pdf

Capsule Wardrobe Checklist PDF: A Comprehensive Guide

Embark on a journey to simplify your style with a capsule wardrobe․ This guide provides a pathway to creating a streamlined, versatile wardrobe using a checklist PDF․ Discover how to build a collection of essential pieces that reflect your personal style and reduce closet clutter, making dressing effortless․

Understanding the Capsule Wardrobe Concept

The capsule wardrobe concept is a minimalist approach to clothing, focusing on curating a collection of versatile and interchangeable items․ It encourages individuals to own fewer clothes while maximizing outfit possibilities․ The core idea revolves around selecting essential pieces that can be mixed and matched, creating a variety of looks with a limited number of garments․

This concept promotes mindful consumption, helping to break free from the cycle of fast fashion and impulsive buying․ A capsule wardrobe typically consists of 30-40 items, including clothing, shoes, and accessories․ The goal is to have a wardrobe filled with high-quality, timeless pieces that can be worn in multiple ways, adapting to different occasions and seasons․

By carefully selecting items that complement each other, a capsule wardrobe simplifies the daily dressing routine, reduces decision fatigue, and saves time and money․ It’s a sustainable and practical approach to fashion, emphasizing personal style over fleeting trends․ The capsule wardrobe concept is not about deprivation, but about intentionality and creating a wardrobe that truly serves your needs and reflects your authentic self․

The beauty of a capsule wardrobe lies in its adaptability, allowing individuals to tailor it to their specific lifestyles, preferences, and climates, ensuring that it remains a functional and stylish solution for their unique needs․

Benefits of Using a Capsule Wardrobe Checklist

Utilizing a capsule wardrobe checklist offers numerous advantages, streamlining the process of creating a functional and stylish wardrobe․ The checklist acts as a guide, ensuring that essential items are included, preventing impulsive purchases, and promoting a more thoughtful approach to clothing selection․ It helps individuals identify gaps in their existing wardrobe and prioritize necessary acquisitions․

A checklist also saves time and reduces decision fatigue by providing a clear framework for building a cohesive collection․ It encourages versatility, ensuring that each item can be mixed and matched to create multiple outfits․ This minimizes clutter, simplifies the daily dressing routine, and fosters a sense of calm and order․

Furthermore, a capsule wardrobe checklist promotes sustainability by reducing the consumption of fast fashion items․ By focusing on quality over quantity, individuals invest in durable, timeless pieces that last longer, reducing waste and minimizing their environmental impact․ It also encourages a deeper understanding of personal style, leading to a more authentic and confident self-expression․

The checklist serves as a reminder to regularly evaluate and update the wardrobe, ensuring that it remains relevant and functional․ This ongoing process allows for continuous refinement, adapting the capsule wardrobe to changing needs and preferences․ Ultimately, a capsule wardrobe checklist empowers individuals to create a wardrobe that is both practical and stylish, reflecting their unique personality and simplifying their lives․

Key Elements of a Capsule Wardrobe

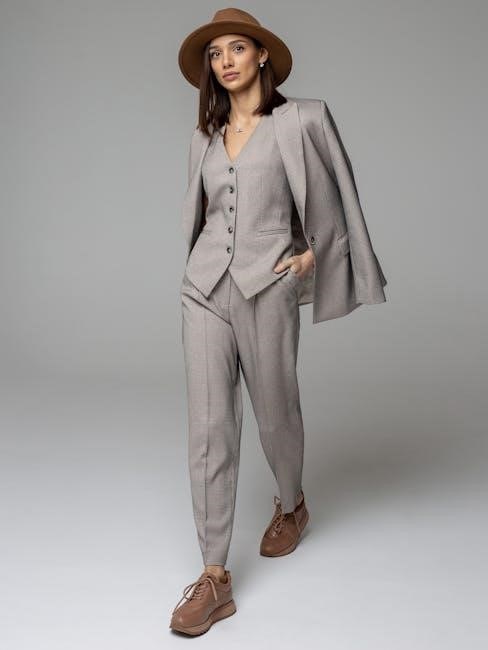
A well-curated capsule wardrobe hinges on several key elements, ensuring versatility and timeless style․ Core basics form the foundation, including neutral-colored tops, bottoms, and outerwear that can be easily mixed and matched․ Think classic t-shirts, button-down shirts, well-fitting jeans, tailored trousers, and a versatile blazer or jacket․

Quality over quantity is paramount, emphasizing durable fabrics and timeless designs that withstand trends․ Investing in pieces that last longer reduces the need for frequent replacements and promotes sustainability․ A neutral color palette is essential for creating a cohesive wardrobe, allowing for seamless integration of different items․ Black, white, gray, navy, and beige are excellent choices for building a versatile foundation․

Personal style should be reflected in the selection of garments, ensuring that the capsule wardrobe aligns with individual preferences and lifestyle․ Incorporate a few statement pieces that add personality and flair, such as a bold scarf, a unique piece of jewelry, or a colorful handbag․ Seasonal considerations are crucial, adapting the capsule wardrobe to changing weather conditions․ Lightweight fabrics and breathable materials are ideal for warmer months, while heavier knits and insulated outerwear are essential for colder seasons․

Proper fit is non-negotiable, as well-fitting clothes enhance comfort and confidence․ Tailoring can make a significant difference in the overall appearance of garments, ensuring a polished and refined look․ Ultimately, the key elements of a capsule wardrobe revolve around creating a versatile, timeless, and personalized collection that simplifies dressing and promotes sustainable fashion choices․

Creating a Personalized Capsule Wardrobe Checklist

Crafting a personalized capsule wardrobe checklist begins with understanding your lifestyle and fashion preferences․ Start by assessing your daily activities and the types of clothing you wear most often․ Are you a professional who needs tailored outfits, or do you prefer casual, comfortable attire for everyday wear? Identifying your lifestyle needs will guide the selection of essential items for your capsule wardrobe․

Next, consider your personal style and the colors, patterns, and silhouettes that make you feel confident and comfortable․ Browse through fashion magazines, Pinterest boards, or your favorite online retailers to gather inspiration․ Take note of the styles that resonate with you and the key pieces that capture your aesthetic․ Once you have a clear understanding of your style preferences, create a list of essential items that align with your lifestyle and fashion choices․

Include versatile pieces that can be mixed and matched to create a variety of outfits․ Think classic basics like neutral-colored tops, bottoms, and outerwear that can be dressed up or down․ Don’t forget to factor in seasonal considerations, selecting lightweight fabrics for warmer months and heavier knits for colder seasons․ Finally, review your existing wardrobe and identify any gaps in your collection․ Use your personalized checklist to guide your shopping decisions and ensure that you only purchase items that are essential to your capsule wardrobe․

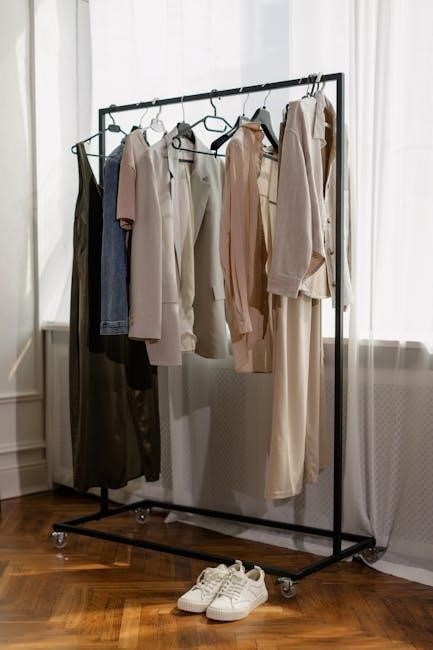
Free Capsule Wardrobe Templates and Resources

Numerous free capsule wardrobe templates and resources are available online to help you kickstart your journey towards a simplified and stylish wardrobe․ These tools offer a structured framework for creating a capsule wardrobe that aligns with your personal style and lifestyle needs․ Many websites and blogs provide downloadable checklist templates in PDF format, allowing you to easily track and organize the essential items in your capsule wardrobe․

These templates often include categories such as tops, bottoms, dresses, outerwear, shoes, and accessories, providing a comprehensive overview of the items you’ll need․ Some templates also feature fillable fields, allowing you to customize the checklist with your specific wardrobe items and quantities․ In addition to checklist templates, many online resources offer style guides, color palette suggestions, and outfit ideas to inspire your capsule wardrobe creation․

Websites and blogs dedicated to minimalist fashion and sustainable living often provide valuable tips and advice on building a versatile and timeless capsule wardrobe․ You can also find free capsule wardrobe planners and calculators that help you determine the ideal number of items for your wardrobe based on your lifestyle and preferences․ By leveraging these free templates and resources, you can streamline the process of creating a capsule wardrobe and achieve a more organized and intentional approach to dressing․

Seasonal Capsule Wardrobe Adjustments

Adapting your capsule wardrobe to the changing seasons is crucial for maintaining both style and functionality throughout the year․ As temperatures fluctuate and weather patterns shift, you’ll need to make adjustments to your wardrobe to ensure you have the appropriate clothing for each season․ In the spring and summer, lighter fabrics, brighter colors, and breathable designs are ideal․ Consider incorporating items like linen shirts, cotton dresses, and sandals into your capsule wardrobe during these warmer months․

Conversely, as autumn and winter approach, heavier fabrics, warmer colors, and layering pieces become essential․ Think about adding items such as wool sweaters, corduroy pants, and insulated jackets to your capsule wardrobe to stay comfortable in colder weather․ When making seasonal adjustments, it’s important to store away items that are no longer appropriate for the current season to create space and keep your wardrobe organized․

You can also use your capsule wardrobe checklist to identify any gaps in your seasonal wardrobe and plan for future purchases․ Consider the specific weather conditions in your region and choose versatile items that can be easily mixed and matched to create a variety of outfits․ By making thoughtful seasonal adjustments, you can ensure that your capsule wardrobe remains relevant and practical throughout the year․

Building a Capsule Wardrobe on a Budget

Creating a stylish and functional capsule wardrobe doesn’t have to break the bank․ Building a capsule wardrobe on a budget requires a strategic approach, focusing on smart shopping habits and resourcefulness․ Start by assessing your current wardrobe and identifying any essential items you already own․ Before purchasing anything new, take inventory of what you have and determine what gaps need to be filled․

Thrift stores and consignment shops can be a treasure trove of high-quality, gently used clothing at affordable prices․ Look for classic, versatile pieces that can be easily incorporated into your capsule wardrobe․ Outlet stores and discount retailers are also great options for finding budget-friendly basics․

Consider investing in a few high-quality, timeless items that will last for years rather than opting for trendy, inexpensive pieces that may not hold up over time․ Prioritize neutral colors and classic silhouettes that can be mixed and matched to create a variety of outfits․ Take advantage of sales and clearance events to save money on wardrobe essentials․

By following these tips, you can build a capsule wardrobe that is both stylish and budget-friendly․ Remember that the key is to focus on quality, versatility, and timelessness when making your purchasing decisions․

Maintaining and Updating Your Capsule Wardrobe

Maintaining a capsule wardrobe is crucial for its long-term success, requiring regular attention and thoughtful updates․ To keep your capsule wardrobe in top shape, implement a routine closet cleanout․ Periodically assess each item to determine if it still fits your style, lifestyle, and body․ Donate or sell items that no longer serve you, ensuring your wardrobe remains curated and relevant․

Proper care and storage are essential for extending the lifespan of your clothing․ Follow care instructions carefully, and invest in quality hangers and storage containers to protect your garments․ Repair any damages promptly, such as loose buttons or small tears, to prevent further deterioration․

As seasons change or your personal style evolves, it’s important to update your capsule wardrobe accordingly․ Introduce new pieces that complement your existing items while staying true to your overall aesthetic․ Consider adding seasonal items, such as lightweight fabrics for summer or cozy knits for winter, to ensure your wardrobe remains practical and versatile․

Avoid impulse purchases and focus on acquiring items that seamlessly integrate into your existing wardrobe․ By following these maintenance and update tips, you can ensure your capsule wardrobe remains a stylish, functional, and sustainable part of your life․

Utilizing a Fillable PDF Capsule Wardrobe Template

A fillable PDF capsule wardrobe template is an invaluable tool for organizing and planning your minimalist wardrobe․ This digital resource simplifies the process of creating a capsule wardrobe list, allowing you to easily input and manage your clothing items․

To effectively use a fillable PDF template, begin by downloading and opening it on your computer or tablet․ The template typically includes various sections for different clothing categories, such as tops, bottoms, outerwear, and accessories․ Within each section, you can type in the specific items you plan to include in your capsule wardrobe․

Take advantage of the template’s fillable fields to add details about each item, such as color, size, and style․ This level of detail helps you visualize your wardrobe and identify any gaps or redundancies․ Many templates also include space for notes, allowing you to record information about outfit combinations or purchase considerations․

One of the key benefits of using a fillable PDF is its flexibility․ You can easily edit and update your list as your style evolves or your needs change․ The digital format also makes it convenient to share your capsule wardrobe plan with others or access it on the go․

By utilizing a fillable PDF capsule wardrobe template, you can streamline the planning process, create a well-organized list of essential items, and ensure your wardrobe aligns with your personal style and lifestyle․

Capsule Wardrobe Checklist for Different Lifestyles

A capsule wardrobe is not a one-size-fits-all solution․ Tailoring your checklist to your specific lifestyle is crucial for creating a functional and satisfying wardrobe․ Consider your daily activities, work environment, and personal style when selecting items for your capsule․

For professionals in a formal office setting, a capsule wardrobe might include classic pieces such as tailored blazers, dress pants or skirts, button-down shirts, and neutral-colored pumps․ The focus is on sophistication and versatility, allowing for easy mixing and matching to create polished outfits․

Individuals with a more casual lifestyle, such as freelancers or stay-at-home parents, can opt for comfortable and practical items like jeans, t-shirts, sweaters, and sneakers․ The emphasis is on ease of movement and effortless style, with a few versatile pieces for occasional outings․

Travelers can create a capsule wardrobe that prioritizes lightweight, wrinkle-resistant clothing that can be easily layered․ Essential items include versatile tops and bottoms, a packable jacket, and comfortable walking shoes․

Athletes or fitness enthusiasts might include activewear pieces that can be worn for workouts and casual activities․ Key items include leggings, sports bras, moisture-wicking tops, and comfortable sneakers․

By considering your unique lifestyle, you can curate a capsule wardrobe checklist that aligns with your daily needs and personal preferences, ensuring you have the right clothing for any occasion․

instructions for safety first car seat

Safety First Car Seat: A Comprehensive Guide to Safe Installation and Use

Ensuring your child’s safety while traveling is paramount, and the Safety First car seat is designed to provide optimal protection․ This guide offers comprehensive instructions for safe installation and use․ We help you to understand important aspects, ensuring the secure and comfortable ride for your child․

Understanding Your Safety First Car Seat Model

Before diving into the installation process, it’s crucial to understand the specific Safety First car seat model you own․ Each model, such as the Grow and Go 3-in-1, has unique features and requirements that affect installation and usage․ Begin by locating the model number, typically found on a sticker on the car seat itself․ Consult the Safety First website or your car seat manual to identify the specific characteristics and functionalities of your model․

Familiarize yourself with the different components of your car seat, including the harness system, recline positions, and adjustment mechanisms․ Understanding how these parts work together will make the installation process smoother and ensure your child’s safety․ Different models may have varying weight and height limits for each mode (rear-facing, forward-facing, and booster), so understanding these limits is paramount․
Remember, each Safety First car seat is designed with specific safety features․ Recognizing these features and understanding their operation is key to maximizing your child’s safety during travel․

Reading the Vehicle Owner’s Manual: A Crucial First Step

Before you even open the Safety First car seat box, your vehicle’s owner’s manual is your most important resource․ It contains essential information about car seat installation specific to your car’s make and model․ You can find critical details about suitable seating positions, the location and usage of lower anchors (LATCH system) and tether anchors, and any vehicle-specific warnings or guidelines regarding child restraint systems․

Pay special attention to sections discussing airbag deployment and its potential impact on children in car seats․ Some vehicles have restrictions on where car seats can be placed, especially concerning side airbags․

The vehicle’s manual also provides instructions on using the seat belt locking mechanism, which might be necessary for securing the car seat if you’re not using the LATCH system․ Each vehicle is different, so understanding these instructions is key․

Ignoring this step can lead to incorrect installation, compromising your child’s safety in the event of a collision․ Always prioritize reading and understanding your vehicle’s manual before proceeding․

Identifying the Correct Car Seat Mode Based on Child’s Age and Weight

Choosing the right mode for your Safety First car seat is crucial for your child’s safety, and this decision hinges primarily on their age and weight․ The Safety First car seat typically offers three modes: rear-facing, forward-facing, and booster mode․ Each mode is designed for specific developmental stages and physical characteristics․
For infants and younger toddlers, the rear-facing mode is the safest option, as it provides maximum support for the head, neck, and spine․ Consult your Safety First car seat manual for specific weight and height limits for rear-facing usage․

As your child grows, they will eventually reach the weight and height limits for rear-facing․ At this point, transition to the forward-facing mode with a harness․ Again, refer to the manual for specific guidelines․
Finally, when your child outgrows the forward-facing harness, they can transition to booster mode․ This mode uses the vehicle’s seat belt to secure your child․ Ensure your child meets the minimum height and weight requirements for booster mode before making the switch․ Always prioritize safety and consult the manual․

Rear-Facing Installation: Step-by-Step Instructions

Installing your Safety First car seat in the rear-facing position requires careful attention to detail․ Begin by consulting both your vehicle’s owner’s manual and the Safety First car seat manual for specific instructions․ Ensure the car seat is placed in the back seat, as this is the safest location for children․

First, adjust the car seat’s recline angle to the appropriate position for rear-facing, as indicated in the manual․ Next, thread the vehicle’s seat belt through the correct belt path on the car seat․ Make sure the seat belt is not twisted․

Firmly push down on the car seat while tightening the seat belt to ensure a snug fit․ If your car has LATCH anchors, you can use them instead of the seat belt, following the instructions in both manuals․

After securing the car seat, check for movement․ It should not move more than one inch in any direction․ If it does, retighten the seat belt or LATCH connectors․ Double-check the recline angle and ensure the harness straps are at or below your child’s shoulders․

Forward-Facing Installation: Step-by-Step Instructions

Transitioning to forward-facing installation necessitates precision to safeguard your child․ Begin by verifying that your child meets the weight and height requirements specified in the Safety First car seat manual․ Consult both your vehicle’s owner’s manual and the car seat manual for specific guidance․

Position the car seat in the vehicle seat, ensuring it’s correctly aligned․ Thread the vehicle’s seat belt through the designated belt path for forward-facing installation, as shown in the car seat manual․ Ensure the seat belt is not twisted and lies flat against the car seat․

Tighten the seat belt securely while applying pressure to the car seat to minimize movement․ Alternatively, use the LATCH system if your vehicle and car seat are equipped․ Connect the LATCH connectors to the vehicle’s anchor points, ensuring they are securely fastened․
Crucially, always use the top tether when installing forward-facing․ Attach the tether to the vehicle’s tether anchor point to limit forward movement during a crash․ The car seat should not move more than one inch in any direction․ Adjust harness straps so they are at or slightly above your child’s shoulders․

Booster Mode Installation: Step-by-Step Instructions

Transitioning your Safety First car seat to booster mode requires careful attention to ensure your child’s continued safety․ Before proceeding, confirm that your child meets the height and weight requirements specified for booster mode in the car seat’s manual․

There are generally two types of boosters: high-back boosters and backless boosters․ Follow the instructions specific to your booster type․ Position the booster seat correctly on the vehicle seat, ensuring it sits flat and stable․

When using a high-back booster, ensure the vehicle’s seat belt is routed through the designated guides on the booster․ For backless boosters, ensure the child’s back is supported by the vehicle’s seat back․

Instruct your child to sit properly, with their back against the vehicle seat․ Fasten the vehicle’s seat belt across your child, ensuring the lap belt lies low and snug across the upper thighs, and the shoulder belt crosses the center of the shoulder and chest․
Never allow the shoulder belt to be placed behind the child’s back or under their arm․ Check that the seat belt retracts properly and is not twisted․ Ensure the child understands the importance of remaining seated upright throughout the ride․

Using the Seat Belt or Lower Anchors (LATCH System)

When installing your Safety First car seat, you have the option of using either the vehicle’s seat belt or the Lower Anchors and Tethers for Children (LATCH) system․ Both methods can provide a secure installation if used correctly․ Always refer to your car seat and vehicle owner’s manuals for specific instructions and compatibility․

To use the seat belt, thread it through the correct path on the car seat, as indicated in the car seat manual․ Ensure the seat belt is locked, either through a locking latch plate or by pulling the belt all the way out and slowly retracting it․ Push down firmly on the car seat while tightening the seat belt to eliminate slack․

For the LATCH system, locate the lower anchors in your vehicle’s seat․ Attach the car seat’s lower anchor connectors to these anchors․ Tighten the straps to remove slack, ensuring a snug fit․ Never use both the seat belt and LATCH system simultaneously unless explicitly permitted by both manuals․

Check the car seat’s movement at the belt path; it should not move more than one inch side to side or front to back․

Properly Securing the Car Seat with a Tether

Using a tether is crucial for forward-facing car seat installations, adding an extra layer of safety by limiting forward head movement in the event of a crash․ The tether strap extends from the top of the car seat and connects to a designated anchor point in your vehicle․ Consult your vehicle’s owner’s manual to locate the correct tether anchor․

Once you have located the anchor, attach the tether hook securely․ Tighten the tether strap according to the car seat manual instructions, ensuring it is snug but not overly tight․ The tether should create a straight line from the car seat to the anchor point without any slack․

A properly secured tether significantly reduces the risk of injury during a collision by minimizing the car seat’s rotation and forward movement․ This helps to protect your child’s head and neck․ Always check the tether’s tightness periodically and readjust as necessary, especially after long trips․ Ensure the tether strap is not twisted or damaged․ If you are unsure about tether installation, seek assistance from a certified Child Passenger Safety Technician․

Adjusting Harness Straps and Ensuring a Snug Fit

Properly adjusting the harness straps is essential for your child’s safety in a car seat․ Start by ensuring the harness straps are at the correct height․ For rear-facing car seats, the straps should be at or slightly below your child’s shoulders․ For forward-facing seats, they should be at or slightly above․

Adjust the straps by using the harness adjuster, typically located at the front of the car seat․ Tighten the straps until they are snug against your child’s body․ You should not be able to pinch any excess webbing at the shoulder․ Perform the “pinch test” to confirm the harness is tight enough․

The chest clip should be positioned at armpit level to keep the harness straps properly located on your child’s shoulders․ Avoid placing the chest clip too high or too low, as this can compromise its effectiveness․

Regularly check and readjust the harness straps as your child grows․ A snug and properly positioned harness is critical for distributing crash forces effectively and minimizing the risk of injury․ Always refer to your Safety First car seat manual for specific instructions on harness adjustment․

Consulting the Safety First Car Seat Manual for Specific Instructions

While this guide offers general information, it is crucial to consult your Safety First car seat manual for model-specific instructions․ Each car seat model has unique features and requirements, making the manual an indispensable resource․ The manual contains detailed diagrams, step-by-step instructions, and important safety warnings tailored to your specific car seat․
The manual will guide you through the proper use and installation of your Safety First car seat, ensuring the safest and most comfortable ride for your child․ It includes information on weight and height limits, recline angles, and harness adjustments specific to your model․

Additionally, the manual provides troubleshooting tips for common installation issues and clarifies any specific requirements for your vehicle․ Following the instructions in the manual will help you maximize the safety and effectiveness of your Safety First car seat․ Always keep the manual readily available for future reference․

canon in d piano sheet music easy free pdf

Canon in D Piano Sheet Music: Easy & Free PDF Resources

Discover a wealth of accessible and cost-free resources for learning Canon in D on the piano. Explore our curated collection of easy piano arrangements and free PDF sheet music. Whether you are a beginner or intermediate player‚ find the perfect version to suit your skill level and musical aspirations.

Canon in D‚ composed by Johann Pachelbel in the Baroque era‚ stands as one of the most recognized and beloved pieces of classical music. Its enduring appeal lies in its simple yet elegant structure‚ characterized by a repeating bass line and a captivating melody that weaves through variations. This timeless piece has transcended its classical origins‚ finding its way into countless weddings‚ film scores‚ and popular culture references.

For aspiring pianists‚ Canon in D offers an excellent entry point into classical music. Its relatively straightforward harmonic progression and melodic contours make it accessible to beginners‚ while its inherent beauty and expressive potential provide ample challenges for more advanced players. The availability of numerous easy piano arrangements and free PDF sheet music online further enhances its appeal to learners of all levels.

This article serves as a comprehensive guide to exploring the world of Canon in D piano sheet music. We’ll delve into its popularity‚ examine beginner-friendly versions‚ discuss intermediate arrangements‚ and provide valuable tips for mastering this iconic piece. We will also uncover resources for finding free sheet music online and learning through tutorials and apps.

Why Canon in D is Popular

Canon in D’s enduring popularity stems from a confluence of factors that resonate deeply with listeners across generations. Its simple harmonic structure‚ built around a repeating bass line and a series of elegant melodic variations‚ creates a sense of calm‚ order‚ and beauty. This inherent simplicity makes it easily accessible and enjoyable‚ even for those without formal musical training.

The piece’s versatility further contributes to its widespread appeal. Canon in D lends itself well to various arrangements and interpretations‚ from solo piano to orchestral performances. Its adaptable nature has allowed it to be incorporated into countless weddings‚ ceremonies‚ and film soundtracks‚ solidifying its place in popular culture. The piece evokes feelings of love‚ celebration‚ and nostalgia‚ making it a fitting accompaniment to life’s most significant moments.

Moreover‚ the availability of easy piano arrangements and free sheet music has democratized access to this iconic piece. Aspiring pianists of all levels can readily learn and perform Canon in D‚ fostering a sense of accomplishment and connection to a timeless musical masterpiece. Its popularity is a testament to its enduring beauty and its ability to touch the hearts of listeners worldwide.

Easy Piano Arrangements: Overview

Easy piano arrangements of Canon in D are specifically designed to make this iconic piece accessible to beginner pianists. These arrangements typically simplify the original composition by reducing the complexity of the chords‚ melodies‚ and rhythms. This allows learners to focus on developing fundamental piano skills while still experiencing the beauty and satisfaction of playing Canon in D.

Key features of easy piano arrangements often include simplified harmonies‚ using basic triads and inversions instead of more complex chords. The melody is usually presented in a clear and straightforward manner‚ often sticking to single notes or simple two-note chords. Rhythmic patterns are also simplified‚ avoiding complex syncopation or challenging time signatures. Fingerings are often included to guide beginners in proper hand positioning and technique.

These arrangements serve as an excellent starting point for novice pianists who want to learn a recognizable and rewarding piece; By mastering an easy version of Canon in D‚ beginners can build confidence‚ develop their musical skills‚ and gain a deeper appreciation for the beauty and elegance of classical music. Furthermore‚ playing a simplified arrangement can motivate learners to progress to more challenging versions as their skills improve.

Finding Free PDF Sheet Music Online

The internet offers a plethora of resources for finding free PDF sheet music of Canon in D‚ catering to various skill levels. Several websites specialize in providing free sheet music for piano‚ often including multiple arrangements of popular pieces like Canon in D. These sites may offer versions specifically designed for beginners‚ intermediate players‚ or even advanced pianists.

To find free PDF sheet music‚ start by using search engines with specific keywords such as “free Canon in D sheet music piano‚” “easy piano sheet music Canon in D PDF‚” or “Canon in D beginner piano sheet music free.” Explore websites dedicated to sheet music archives‚ online piano tutorials‚ and communities of musicians who share their arrangements. Be sure to preview the sheet music before downloading to ensure it matches your skill level and preferences.

Many websites offer user ratings and reviews of sheet music arrangements‚ which can help you determine the quality and accuracy of the transcription. Some sites may also offer accompanying audio recordings or video tutorials to aid in learning the piece. Remember to respect copyright laws and only download sheet music that is explicitly offered for free or is in the public domain.

Beginner-Friendly Versions: Key Features

Beginner-friendly versions of Canon in D piano sheet music are specifically designed to make learning this beautiful piece accessible to novice players. These arrangements typically incorporate several key features to simplify the music without sacrificing its essence. One common feature is the use of simplified harmonies‚ often focusing on basic chords and avoiding complex voicings.

Another key aspect is the reduction in the number of notes played simultaneously‚ creating a clearer and less cluttered sound. The melody is often emphasized‚ while the accompaniment is simplified to support the main theme without overwhelming the beginner. Additionally‚ beginner-friendly versions often include helpful fingerings to guide the player and promote proper technique.

The tempo may also be indicated at a slower pace‚ allowing beginners to learn the notes and rhythms more accurately. Furthermore‚ these arrangements often feature larger font sizes and clear notation‚ making the sheet music easier to read. Key signatures and time signatures are typically kept simple‚ avoiding complex sharps or flats that can be challenging for beginners to grasp. Ultimately‚ the goal is to provide an enjoyable and achievable learning experience for those new to the piano.

Intermediate Level Arrangements

Intermediate level arrangements of Canon in D offer a more challenging and nuanced experience for pianists who have developed some foundational skills. These versions typically feature richer harmonies‚ incorporating more complex chords and voicings that add depth and texture to the music. The arrangements often include more intricate accompaniment patterns‚ requiring greater dexterity and coordination.

Intermediate players will encounter more varied rhythms and syncopation‚ demanding a stronger sense of timing and musicality. Fingerings may be less explicitly marked‚ encouraging players to develop their own solutions and interpretations. Dynamic markings and articulation are often more detailed‚ prompting a greater awareness of musical expression and phrasing.

Furthermore‚ intermediate arrangements may include embellishments such as grace notes‚ trills‚ or mordents‚ adding a touch of sophistication to the performance. The tempo may be indicated at a faster pace‚ requiring greater technical proficiency. These arrangements provide an opportunity for intermediate pianists to refine their skills‚ explore their musicality‚ and delve deeper into the beauty and complexity of Canon in D‚ while still being accessible and enjoyable to play. The goal is to challenge and inspire‚ fostering further growth and musical expression.

Understanding the Musical Structure

To truly master Canon in D on the piano‚ understanding its musical structure is paramount. The piece is built upon a repeating bass line‚ known as a ground bass or basso ostinato‚ which provides a stable harmonic foundation throughout. This bass line typically consists of eight notes and repeats continuously‚ creating a sense of unity and predictability.

Above this ground bass‚ three voices enter sequentially‚ each playing the same melodic line but starting at different points in time. This staggered entry of identical melodies is what defines the canon form. The melody in Canon in D is diatonic and stepwise‚ creating a sense of smoothness and elegance.

The piece is in D major‚ imbuing it with a bright and optimistic character. The harmonic progression is relatively simple but effective‚ primarily utilizing the I‚ IV‚ and V chords in D major. This clear harmonic structure allows listeners to easily follow the musical development. Recognizing the interplay between the repeating bass line and the canonic melodies is key to appreciating the piece’s intricate yet accessible design. By grasping these fundamental elements‚ pianists can approach Canon in D with greater insight and musicality‚ leading to a more satisfying performance.

Tips for Playing Canon in D on Piano

Mastering Canon in D on the piano requires a combination of technical skill and musical sensitivity. Begin by focusing on the consistent rhythm and evenness of the repeating bass line. This foundation is crucial for maintaining the piece’s structure. Practice the bass line separately until it becomes automatic‚ allowing you to focus on the melodic lines later.

Pay close attention to the articulation of each note. Strive for a legato touch‚ connecting the notes smoothly to create a flowing melody. Avoid any abruptness or choppiness‚ which can disrupt the piece’s calming effect. As you play the canonic melodies‚ listen carefully to how they interact with each other. Bring out the entrances of each voice‚ ensuring that each melodic line is clearly audible.

Focus on dynamics to add depth and expression to your performance. Build gradually towards the climax of the piece‚ then gently taper off towards the end. Use subtle variations in dynamics to highlight the different sections and create a sense of musical storytelling. Remember to breathe with the music‚ allowing your phrasing to naturally shape the melody. With careful practice and attention to detail‚ you can bring out the beauty and elegance of Canon in D on the piano.

Learning Resources: Tutorials and Apps

Embark on your Canon in D piano journey with a wealth of learning resources designed to cater to various skill levels and learning preferences. Numerous online tutorials offer step-by-step guidance‚ breaking down the piece into manageable sections. These tutorials often include demonstrations of proper fingering‚ articulation‚ and dynamics‚ helping you develop a solid technical foundation.

Consider exploring interactive piano learning apps‚ such as La Touche Musicale‚ which provide personalized lessons and real-time feedback. These apps often feature gamified exercises and progress tracking‚ making the learning process engaging and motivating. For visual learners‚ video tutorials on platforms like YouTube offer a valuable resource‚ allowing you to observe experienced pianists performing the piece and explaining their approach.

Supplement your learning with method books and sheet music collections specifically designed for beginner and intermediate pianists. These resources typically include exercises and practice tips to reinforce fundamental skills. Additionally‚ consider joining online piano communities and forums‚ where you can connect with fellow learners‚ ask questions‚ and share your progress. With a combination of these resources‚ you’ll be well-equipped to master Canon in D and enhance your overall piano playing abilities.

Common Mistakes and How to Avoid Them

Navigating the intricacies of Canon in D on the piano can present certain challenges. One common mistake is rushing the tempo‚ particularly in the faster sections. To avoid this‚ practice with a metronome to establish a steady beat and gradually increase the tempo as you become more comfortable; Another frequent error is neglecting dynamics‚ resulting in a monotonous performance. Pay close attention to the marked dynamics in the sheet music and experiment with varying levels of volume to create expressive phrasing.

Inconsistent fingerings can also hinder your progress. Carefully analyze the suggested fingerings in the sheet music and adapt them to your own hand size and comfort level. Practice difficult passages slowly and repeatedly‚ focusing on accuracy and coordination. It’s also crucial to maintain a relaxed posture and avoid tension in your hands and arms. Regular breaks can help prevent fatigue and improve your overall playing.

Finally‚ many beginners struggle with the coordination between the left and right hands. Practice each hand separately before attempting to combine them. Start at a slow tempo and gradually increase the speed as your coordination improves. By addressing these common mistakes with focused practice and attention to detail‚ you can achieve a polished and satisfying performance of Canon in D.

Transposing Canon in D for Different Skill Levels

Transposing Canon in D opens up avenues for pianists of varying abilities to enjoy this timeless piece. For beginners‚ transposing the piece to a simpler key‚ such as C major‚ can significantly reduce the complexity of the chords and melodic lines. This allows learners to focus on mastering the fundamental elements of the piece‚ such as rhythm‚ dynamics‚ and basic finger coordination‚ without being overwhelmed by challenging key signatures or intricate chord voicings.

Intermediate players might explore transposing Canon in D to keys like G major or A major to further develop their understanding of key relationships and chord progressions. This exercise encourages a deeper appreciation for the harmonic structure of the piece and enhances their ability to adapt to different musical contexts. Furthermore‚ transposing to these keys introduces new technical challenges‚ such as navigating different finger patterns and adapting to altered hand positions‚ thereby promoting overall pianistic growth.

For advanced pianists‚ transposing Canon in D to more remote keys like E major or F# major presents an opportunity to showcase their virtuosity and musicality. These keys demand a high level of technical proficiency and a refined sense of musical expression. Transposition at this level can be a powerful tool for personalizing the piece and creating a unique interpretation that reflects the pianist’s individual style and artistic vision.

The History and Composer: Johann Pachelbel

Johann Pachelbel‚ a prominent German composer of the Baroque period‚ was born in Nuremberg in 1653 and passed away in 1706. His father was a wine merchant. During his lifetime‚ Pachelbel was a highly respected and prolific composer‚ organist‚ and teacher. He held various musical positions throughout Germany‚ including organist posts in Nuremberg‚ Erfurt‚ and Stuttgart‚ before eventually settling in his hometown of Nuremberg.

Pachelbel’s musical style is characterized by its clarity‚ elegance‚ and craftsmanship. He was a master of counterpoint and harmony‚ and his works often exhibit a sense of balance and proportion. While he composed in various genres‚ including organ music‚ vocal works‚ and chamber music‚ he is best known today for his Canon in D‚ a piece that has achieved enduring popularity and widespread recognition.

Despite the Canon’s fame‚ much of Pachelbel’s other music remains relatively unknown. His contributions to the development of Baroque music‚ particularly his organ works‚ are significant and deserve greater recognition. Pachelbel’s influence can be seen in the works of later composers‚ including Johann Sebastian Bach‚ whose elder brother Johann Christoph Bach studied with Pachelbel. The Canon in D‚ however‚ remains his most enduring legacy‚ captivating audiences with its simple yet profound beauty.

Canon in D‚ with its timeless appeal‚ offers a fulfilling musical journey for pianists of all levels. From the initial exploration of beginner-friendly arrangements to the mastery of more complex versions‚ the piece provides continuous opportunities for growth and enjoyment. Embrace the learning process‚ experiment with different interpretations‚ and allow the music to resonate within you.

Whether you are preparing for a performance‚ seeking a relaxing pastime‚ or simply immersing yourself in the beauty of classical music‚ Canon in D offers a versatile and rewarding experience. Its enduring popularity speaks to its universal appeal and its ability to evoke a sense of peace and tranquility. So‚ take advantage of the free sheet music resources available‚ practice diligently‚ and savor each note as you bring this iconic piece to life.

Ultimately‚ the goal is to connect with the music on a personal level and to share its beauty with others. Whether you are playing for an audience or simply enjoying it in the privacy of your own home‚ Canon in D has the power to uplift and inspire. So‚ embark on your musical journey‚ explore the depths of this timeless masterpiece‚ and let the joy of playing Canon in D fill your life with harmony and beauty.

books and manuals

Books and manuals serve distinct, yet crucial roles. Books offer broad knowledge, while manuals provide specific guidance. Both are essential resources, facilitating learning and skill development. They also help answer factual queries.

The Role of Reference Books

Reference books are indispensable tools designed for efficient information retrieval. They stand apart from general reading materials, offering pinpointed answers to specific queries. Unlike novels or textbooks meant for sequential reading, reference books are consulted for targeted information, making them vital in research, education, and professional settings.

These sources, including yearbooks, almanacs, directories, handbooks, and manuals, are crucial for quickly accessing facts. They play a critical role in various domains by providing concise and reliable data. They support informed decision-making and contribute to expanding one’s knowledge. Their role in education and research cannot be overstated.

Reference books enable efficient access to knowledge, contributing to a better understanding of the world.

Types of Manuals

Manuals come in various forms, each serving a unique purpose. Common types include user manuals, operations manuals, and technical manuals. Each type caters to specific needs, offering guidance and instructions.

User Manuals: Guiding Product Operation

User manuals are the most commonly encountered type of manual. These documents are crafted to assist users in the correct and safe operation of a product. They explain how something works and are designed to enhance user experience, with real-world examples.

They include instructions, troubleshooting guides addressing typical user problems, and FAQs. User manuals provide comprehensive instructions for operating machinery or products. They maximize learning, minimize errors, and are essential for new archivists and genealogists, or even a complete novice.

Different types of user manuals include user guides and standard operating procedures. User manuals come in different shapes and sizes, such as quick start guides, installation manuals, help files, and instruction videos.

Operations Manuals: Company Standards and Procedures

Operations manuals relay the standards and procedures of a company. They outline how each work area operates and are essential for maintaining consistency. Each work area has its own manual, providing detailed instructions on specific tasks.

These manuals serve as a practical guide, and may vary per industry. Operations manuals present themselves in different formats, including checklists and online e-learning webpages. They provide facts, terms, and concepts.

Unlike general reading materials, operations manuals are designed to be consulted for specific information. They play a critical role in ensuring that employees adhere to established protocols. They contain comprehensive instructions.

The Manual of Operations relay the standards and procedures of your company. These manuals are detailed guides on how something works within the organization.

Technical Manuals: Descriptive and Optional Processes

Technical manuals are descriptive documents that detail optional processes. They guide users through specific tasks, offering instructions for accomplishing something. These manuals provide detailed explanations of how something works.

They are not just instructions; they describe optional processes. Even the instructions in it describe optional processes, that if you want to accomplish something, do it this way.

Unlike user manuals that focus on product operation, technical manuals delve into the intricacies of systems. They are designed for users who require an in-depth understanding. They can also be short.

These manuals often include troubleshooting guides. They address typical user problems and provide solutions. They minimize errors during technical procedures. Technical manuals address user problems.

Technical Manuals provide detailed instructions on a particular subject, such as how-to-do something or how something works. They are considered subject area tools.

Handbooks vs. Manuals

Handbooks and manuals differ in detail and purpose. Manuals provide comprehensive instructions. Handbooks offer concise reference; Both are subject area tools, yet cater to different information needs.

Key Differences: Detail and Purpose

The core distinction between handbooks and manuals lies in their depth and intent. Manuals are comprehensive, providing detailed instructions for operating equipment or executing processes. They aim for clarity and precision, leaving little room for ambiguity. Think of them as exhaustive guides, meticulously crafted to ensure successful task completion.

Handbooks, conversely, are concise reference guides. They offer a distilled overview of a subject, presenting key facts, terms, and concepts. Their purpose is quick information retrieval, acting as readily accessible resources for specific queries. Unlike manuals, they don’t delve into exhaustive step-by-step instructions. They serve as handy companions, providing essential knowledge at a glance. Choosing between the two depends on the user’s need for either detailed guidance or quick reference.

Handbooks: Concise Reference Guides

Handbooks are designed as readily accessible tools, offering quick access to essential information. They present facts, terms, and concepts related to a specific subject area in a distilled format. This conciseness makes them ideal for users seeking immediate answers or a brief overview. Unlike manuals, which provide exhaustive instructions, handbooks prioritize brevity and ease of use.

They serve as convenient companions, providing essential knowledge at a glance. Whether it’s a traveler’s guidebook or a subject-specific reference, handbooks are valuable resources for anyone needing quick access to key information. Their focus on conciseness makes them perfect for on-the-go reference and rapid information retrieval.

Handbooks are subject area tools that are easily accessible.

Manuals: Detailed Instructions

Manuals offer comprehensive and step-by-step guidance on specific tasks or subjects. They are designed to provide users with thorough instructions, ensuring accurate and safe execution. Unlike handbooks, which provide concise overviews, manuals delve into intricate details. They explain how something works or how to perform a particular task.

This detailed approach makes them indispensable for operating machinery, using software, or following complex procedures. Manuals can come in various forms, including user guides, installation instructions, and reference documents. They ensure that users have all the information necessary to achieve desired outcomes.

Manuals present themselves in all kinds of shapes and sizes. Manuals also provide detailed instructions on a particular subject, such as how-to-do something or how something works.

Style Manuals

Style manuals are essential guides for formatting and recording information correctly. These books dictate the specific styles used in research and writing, ensuring consistency and clarity. They help maintain professional standards.

Formatting and Recording Information

Style manuals are indispensable resources that meticulously illustrate how to format and record information accurately across various disciplines. These comprehensive guides provide detailed instructions on citation styles, grammar rules, and document layout, ensuring consistency and clarity in written communication. Different fields often adhere to specific style manuals, such as APA for psychology, MLA for humanities, and Chicago for history, each with its unique set of guidelines.

By following a style manual, researchers, writers, and students can present their work in a standardized and professional manner. These manuals cover everything from structuring paragraphs and creating bibliographies to formatting tables and figures. They serve as essential tools for maintaining credibility and avoiding plagiarism by properly attributing sources.

Therefore, a thorough understanding of the relevant style manual is crucial for anyone involved in academic or professional writing. These resources streamline the writing process and enhance the overall quality of the final product.

Other Types of Reference Sources

Beyond manuals, yearbooks and almanacs offer factual data. Directories provide contact information, differing from encyclopedias. These ready reference sources answer specific queries, and they support research, education, and general knowledge.

Yearbooks and Almanacs: Factual Queries

Yearbooks and almanacs are invaluable reference sources designed to answer factual queries quickly and efficiently. Unlike general reading materials meant to be read cover-to-cover, these publications are consulted for specific pieces of information. They are serial publications, updated regularly to provide the most current data available. Yearbooks typically offer a summary of the year’s events, statistics, and developments in various fields, making them useful for historical context and tracking trends.

Almanacs, on the other hand, focus on providing a wide range of statistical, tabular, and factual information, including weather forecasts, astronomical data, and demographic details. Both yearbooks and almanacs serve as essential tools for research, education, and anyone seeking concise, pinpointed answers to factual questions. Their ready reference nature makes them indispensable resources in libraries, schools, and homes. They stand apart from encyclopedias by offering focused, up-to-date information tailored to specific inquiries.

Directories: Contact Information

Directories are specialized reference books primarily designed to provide contact information for individuals, organizations, or businesses. Unlike other reference sources that focus on factual data or instructional content, directories serve as comprehensive listings, enabling users to locate specific entities and their corresponding contact details. These publications come in various forms, including telephone directories, business directories, and professional directories, each tailored to a specific purpose.

Telephone directories, for instance, list individuals and their phone numbers within a particular geographic area. Business directories, on the other hand, compile information about companies, including their addresses, phone numbers, websites, and key personnel. Professional directories focus on individuals within a specific profession, such as doctors, lawyers, or engineers, providing their contact information and credentials. Directories are essential tools for networking, market research, and general information retrieval, offering a quick and efficient means of locating relevant contacts. They represent a distinct category of ready reference sources, differing from encyclopedias and manuals in their singular focus on providing contact information.

Visual Journals and Altered Books

Visual journals and altered books offer avenues for creative expression. They provide a space for artistic exploration. These mediums welcome both experienced artists and novices, fostering personal growth through visual storytelling.

Creative Expression and Exploration

Visual journals and altered books stand apart from traditional manuals. They are tools for creative expression. They encourage exploration of personal narratives. Unlike structured manuals, these books embrace artistic freedom. They welcome experimentation with various mediums, such as painting and collage.

These visual spaces become personal reflections, documenting thoughts and feelings. They offer a tangible outlet for processing experiences. Artists, writers, and anyone seeking self-discovery can benefit from these practices. Altered books transform existing texts into new works of art.

The act of altering a book can be therapeutic, providing a sense of control. This is done by repurposing found materials. These journals become unique repositories of memories and artistic endeavors. Ultimately, they serve as a testament to the power of creative exploration. They also help artists develop new skills.

mcgraw-hill my math grade 5 answer key pdf

McGraw-Hill My Math Grade 5 Answer Key PDF: A Comprehensive Guide

Navigating the world of fifth-grade math can be challenging, but the McGraw-Hill My Math Grade 5 Answer Key PDF serves as a valuable tool. This comprehensive guide offers solutions and support, aiding students in mastering mathematical concepts. With clear explanations and step-by-step solutions, it promotes understanding and academic success.

Overview of McGraw-Hill My Math Grade 5

McGraw-Hill My Math Grade 5 is designed to build conceptual understanding, application, and procedural skill and fluency in young learners. The program provides various opportunities for student engagement, including vocabulary support, homework pages, real-world problem-solving investigations, and fluency practice. Content is meticulously organized to address the Standards for Mathematics and emphasize Mathematical Practices, ensuring students are well-prepared.

Hands-on activities connect learning to the real world, making math more relatable and engaging for students. This interactive approach helps students grasp complex concepts more easily. The curriculum solutions offered by McGraw-Hill Education aim to enhance subject skills and provide proper guidance for learning mathematics.

Furthermore, the availability of teacher editions, student editions, and supplementary materials like videos, apps, and worksheets ensures a comprehensive learning experience. The program is structured into units and lessons, providing a clear and organized path for both students and teachers. With its focus on real-world applications and interactive learning, McGraw-Hill My Math Grade 5 aims to foster a deep understanding of mathematical principles.

Availability of Answer Keys in PDF Format

The McGraw-Hill My Math Grade 5 answer keys are readily available in PDF format, providing a convenient and accessible resource for students and educators alike. These answer keys are designed to complement the McGraw-Hill My Math Grade 5 curriculum, offering step-by-step solutions and explanations for every problem in the textbook. The digital format allows for easy access on various devices, including computers, tablets, and smartphones, making it a versatile tool for both classroom and home use.

The PDF format ensures that the answer keys are easily printable, allowing students to have a physical copy for reference while working through assignments. The availability of answer keys in PDF format significantly enhances the learning experience by providing immediate feedback and support, enabling students to check their work and identify areas where they may need additional help.

Moreover, the PDF answer keys often include detailed explanations that go beyond simply providing the correct answer, fostering a deeper understanding of the underlying mathematical concepts. This resource is invaluable for reinforcing learning and building confidence in math skills. Several online platforms and educational websites offer these answer keys for download, ensuring that students and teachers can easily access them.

Accessing and Utilizing the Answer Key PDF

Effectively accessing and utilizing the McGraw-Hill My Math Grade 5 Answer Key PDF involves locating the correct volume and strategically using it for homework. This resource aids in understanding solutions, verifying answers, and reinforcing math concepts learned in the classroom.

Finding the Correct Answer Key Volume (1 & 2)

To effectively utilize the McGraw-Hill My Math Grade 5 Answer Key PDF, it’s crucial to pinpoint the correct volume. The material is typically split into two volumes, each covering distinct units and lessons within the curriculum. Identifying whether you need Volume 1 or Volume 2 depends on the specific homework assignment, lesson, or unit you’re working on.

Referencing your student edition textbook or the teacher’s edition is essential. Check the table of contents or the unit headings to determine which volume corresponds to the material you’re studying. Pay close attention to chapter numbers and lesson titles, as these indicators will guide you to the appropriate answer key.

McGraw-Hill often organizes its resources by semester or term, so Volume 1 might cover the first half of the school year, while Volume 2 covers the second half. Double-check the copyright information or the introductory pages of your textbook for any explicit volume designations. Using the incorrect volume will lead to frustration and inaccurate answers.

Using the Answer Key for Homework and Practice

The McGraw-Hill My Math Grade 5 Answer Key PDF is a powerful tool for reinforcing learning during homework and practice sessions. However, it’s vital to use it effectively to maximize its benefits. Start by attempting the problems independently, applying the concepts learned in class. This allows you to identify areas where you struggle.

Once you’ve completed the assignment, compare your solutions to those in the answer key. Don’t just look for the final answer; examine the step-by-step solutions provided. This will help you understand the reasoning behind each step and identify any errors in your approach. If your answer differs, carefully analyze the solution to pinpoint where you went wrong.

The answer key should be used as a learning aid, not a shortcut. Avoid simply copying answers without understanding the underlying concepts. Use it to verify your work, clarify confusion, and deepen your understanding. Consider working through similar problems to solidify your grasp of the material. Remember, consistent practice with the answer key as a guide will lead to greater proficiency and confidence in math.

Benefits of Using the McGraw-Hill My Math Grade 5 Answer Key

The McGraw-Hill My Math Grade 5 Answer Key offers numerous benefits, including improved understanding of mathematical concepts; It aids in homework completion, provides clarity, and fosters confidence. Ultimately, it supports academic success and enhances problem-solving abilities in mathematics for fifth graders.

Enhancing Subject Skills and Understanding

The McGraw-Hill My Math Grade 5 Answer Key PDF plays a pivotal role in enhancing subject skills and fostering a deeper understanding of mathematical concepts. By providing detailed solutions and step-by-step explanations, it enables students to grasp the underlying principles behind each problem. This leads to improved problem-solving abilities and a more comprehensive understanding of the curriculum.

The answer key serves as a valuable resource for students to check their work, identify areas of weakness, and learn from their mistakes. With the proper guidance given, students can learn mathematics concepts. It facilitates self-assessment and encourages independent learning, empowering students to take control of their academic progress. Furthermore, it can make…

Moreover, the answer key helps bridge the gap between classroom instruction and independent practice. Students can refer to it when tackling homework assignments or preparing for tests, ensuring that they have a solid grasp of the material. This, in turn, builds confidence and reduces anxiety surrounding math-related tasks. It reinforces learning and promotes long-term retention of knowledge. The McGraw-Hill My Math resources offer opportunities such as homework pages, real-world problem-solving investigations, and fluency practice, providing meaningful student engagement.

Improving Test Scores and Academic Performance

The McGraw-Hill My Math Grade 5 Answer Key PDF is instrumental in improving test scores and overall academic performance. By providing students with a reliable resource to check their work and understand solutions, it fosters accuracy and efficiency in problem-solving. This directly translates to better performance on tests and quizzes, as students are more confident in their abilities and less likely to make careless errors.

The answer key enables students to identify their areas of weakness and focus their study efforts accordingly. Through targeted practice and review, they can strengthen their understanding of challenging concepts and improve their overall mastery of the subject matter. This proactive approach to learning leads to significant gains in academic performance and a greater sense of accomplishment. Furthermore, proper guidance to learn the mathematics concepts and score all your tests with high grades.

Moreover, the answer key promotes a deeper understanding of mathematical principles, which is essential for long-term academic success. By grasping the underlying concepts, students are better equipped to tackle more complex problems and excel in future math courses. The availability of solutions reinforces key ideas and helps students develop a solid foundation for future learning, ultimately contributing to improved academic outcomes.

Resources Available Alongside the Answer Key

Beyond the answer key, McGraw-Hill offers student and teacher editions, interactive resources, and supplementary materials. Videos, mobile apps, and worksheets complement the core curriculum, enhancing engagement and providing diverse learning opportunities for students and educators alike.

Student Editions and Teacher Editions

McGraw-Hill’s My Math Grade 5 program offers both Student Editions and Teacher Editions designed to facilitate effective learning and instruction. The Student Edition is crafted to build conceptual understanding, application skills, and procedural fluency through engaging activities and real-world problem-solving investigations. It aligns with mathematics standards, emphasizing mathematical practices to connect learning to practical scenarios.

The Teacher Edition provides comprehensive support for educators, offering point-of-use references to lesson presentations and digital resources, simplifying planning and instruction. It includes solutions, a suggested daily schedule, and a supply list, streamlining lesson preparation. The Teacher Edition complements the Student Edition, fostering a cohesive learning experience.

These editions work in tandem to create an effective educational environment. Student Editions focus on interactive learning, while Teacher Editions provide the necessary tools for educators to deliver engaging and informative lessons. Together, they ensure a well-rounded approach to mastering mathematical concepts in Grade 5; The availability of both editions supports a structured and comprehensive learning experience.

Supplementary Materials: Videos, Apps, and Worksheets

To enhance the learning experience with McGraw-Hill My Math Grade 5, a variety of supplementary materials are available, including videos, apps, and worksheets. These resources are designed to reinforce concepts and provide additional practice opportunities. Videos offer visual explanations and step-by-step solutions, catering to different learning styles and making complex topics more accessible.

Mobile apps provide interactive exercises and games, allowing students to practice math skills in an engaging and convenient format. These apps often include features such as progress tracking and personalized feedback, helping students identify areas where they need additional support. Worksheets offer further practice problems and activities, allowing students to solidify their understanding of key concepts.

These supplementary materials are designed to complement the core curriculum and provide a well-rounded learning experience. By utilizing videos, apps, and worksheets, students can reinforce their understanding of mathematical concepts and improve their problem-solving skills. These resources offer flexibility and cater to diverse learning preferences, ensuring that every student has the opportunity to succeed in math.

safety first car seat instruction manual

The Safety First Car Seat Instruction Manual provides guidance on installing and using car seats safely, with

    step-by-step instructions

to ensure a secure fit for children, and is available online for reference purposes always.

Overview of the Guide 65 Convertible Car Seat

The Guide 65 Convertible Car Seat is a versatile and convenient option for families, designed to fit three seats across in the back of most vehicles, making it ideal for growing families and carpools. This car seat comes with a removable cup holder, adding to its practicality. The Guide 65 is a convertible car seat, meaning it can be used in both rear-facing and forward-facing positions, providing a safe and comfortable ride for children. With its ability to accommodate children up to 40 pounds in the rear-facing position and up to 65 pounds in the forward-facing position, this car seat is a great choice for parents who want a seat that will grow with their child. The Guide 65 also features a 5-point harness, ensuring a secure fit for children. Additionally, the seat is designed to be compact, making it a great option for smaller vehicles. Overall, the Guide 65 Convertible Car Seat is a reliable and practical choice for families, offering a safe and comfortable ride for children. The seat’s versatility and convenience make it an excellent option for daily use.

Key Features of the Guide 65 Car Seat

The Guide 65 Car Seat has several key features that make it a popular choice among parents. One of the main features is its compact design, which allows it to fit three seats across in the back of most vehicles. The seat also comes with a removable cup holder, which is a convenient feature for parents. The Guide 65 has a weight range of 5-40 pounds in the rear-facing position and 22-65 pounds in the forward-facing position, making it a great option for children of different ages and sizes. The seat also features a 5-point harness, which provides a secure fit for children. Additionally, the Guide 65 is designed to be easy to install and use, with a simple and intuitive design. The seat is also designed to be comfortable for children, with a padded seat and headrest. Overall, the Guide 65 Car Seat is a great option for parents who want a safe, convenient, and comfortable seat for their child. The seat’s features make it a great value for the price, and it is a popular choice among parents who want a reliable and practical car seat.

Installation Guide for the Guide 65 Car Seat

Follow the manufacturer’s instructions and use the vehicle owner’s manual for guidance on installing the Guide 65 Car Seat correctly and safely always.

Rear-Facing Installation Steps

To install the Guide 65 Car Seat in a rear-facing position, start by reading the vehicle owner’s manual to locate the correct seating position and ensure the seat belt or lower anchors are accessible. The Guide 65 Car Seat can be used in a rear-facing position for children weighing up to 40 pounds and measuring 19-40 inches in height. Next, position the car seat in the rear-facing direction and attach the seat belt or lower anchors, making sure they are securely fastened. Use the level indicator on the side of the car seat to ensure it is at the correct angle. Then, tighten the seat belt or lower anchors to secure the car seat in place. Finally, check the car seat’s position and adjust as needed to ensure a safe and comfortable fit for the child. By following these steps, parents can ensure their child is safely secured in the Guide 65 Car Seat while traveling. The installation process may vary depending on the vehicle, so it is essential to consult the vehicle owner’s manual for specific instructions.

Forward-Facing Installation Steps

The Guide 65 Car Seat can be converted to a forward-facing position for children weighing between 22-65 pounds and measuring 29-49 inches in height. To install the car seat in a forward-facing position, first ensure the child meets the minimum age and weight requirements. Next, adjust the harness straps to fit the child snugly and position the car seat in the forward-facing direction. Attach the seat belt or lower anchors, making sure they are securely fastened, and use the tether strap to anchor the car seat to the vehicle. The tether strap helps to reduce the forward movement of the car seat in the event of a crash. Use the level indicator on the side of the car seat to ensure it is at the correct angle. Then, tighten the seat belt or lower anchors to secure the car seat in place. Finally, check the car seat’s position and adjust as needed to ensure a safe and comfortable fit for the child. The forward-facing installation provides added protection and support for older children.

Importance of Following the Manufacturer’s Instructions

Following the manufacturer’s instructions is crucial for ensuring child safety and proper car seat installation always.

Referencing the Vehicle Owner’s Manual

To ensure a safe and proper installation of the car seat, it is essential to reference the vehicle owner’s manual. The manual will provide specific instructions on how to install a car seat in the vehicle, including the location of the seat belts and anchors. By following the instructions in the vehicle owner’s manual, parents and caregivers can ensure that the car seat is installed correctly and that their child is safe while traveling. The vehicle owner’s manual will also provide information on the types of car seats that are compatible with the vehicle, which is important for selecting the right car seat for the child. Additionally, the manual may include tips and guidelines for installing the car seat in different positions, such as rear-facing or forward-facing. By taking the time to read and follow the instructions in the vehicle owner’s manual, parents and caregivers can help to prevent accidents and ensure their child’s safety while traveling. This is an important step in the process of installing a car seat and should not be overlooked.

Maximizing Safety for the Child

Maximizing safety for the child is the primary concern when using a car seat. The Safety First Car Seat Instruction Manual provides guidance on how to ensure the child’s safety while traveling. By following the instructions in the manual, parents and caregivers can help to prevent accidents and injuries. The manual provides information on the proper use of the car seat, including the correct position and installation. It also provides guidelines for selecting the right car seat for the child, based on their age, weight, and height. Additionally, the manual offers tips on how to ensure the child’s comfort and security while traveling, such as adjusting the harness and seat position. By taking the time to read and follow the instructions in the manual, parents and caregivers can help to maximize the child’s safety and prevent accidents. This is an important step in ensuring the child’s well-being and should be taken seriously. The Safety First Car Seat Instruction Manual is a valuable resource for anyone who wants to ensure the safety of their child while traveling.

dyson dc17 user manual

Dyson DC17 User Manual: A Comprehensive Guide

Welcome to your comprehensive guide to the Dyson DC17 vacuum! This manual will provide everything from initial setup to troubleshooting‚ and available spares. Download the PDF version of your Dyson DC17 upright vacuum user manual.

Understanding Your Dyson DC17

Before diving into the specifics of using and maintaining your Dyson DC17‚ it’s crucial to understand its core features and technology. The DC17 is a powerful upright vacuum cleaner designed for whole-home cleaning‚ equipped with Root Cyclone technology for consistent suction. This technology efficiently separates dirt and dust from the air‚ preventing clogging and maintaining optimal performance. Familiarize yourself with the various components of your DC17‚ including the wand release‚ brush bar‚ and filters. Knowing the function of each part will assist you in effective operation and maintenance.

The DC17 is engineered for ease of use‚ featuring a lightweight design and maneuverability; Its ergonomic handle and intuitive controls make cleaning more comfortable. The vacuum’s powerful suction is suitable for various floor types‚ from carpets to hard floors. Understanding these fundamental aspects of your Dyson DC17 will ensure you maximize its cleaning capabilities. Reviewing the included user manual‚ available for download in PDF format‚ provides further detailed information and diagrams.

Remember‚ the DC17 is designed for domestic use; always adhere to safety instructions. Regular maintenance‚ as outlined in this guide‚ will extend the life of your vacuum.

Initial Setup and Assembly

Proper assembly is crucial for optimal performance of your Dyson DC17. Upon unboxing‚ carefully remove all components and refer to the included parts list to ensure everything is present. Begin by attaching the handle to the main body of the vacuum until it clicks securely into place. Next‚ connect the hose to the designated port‚ ensuring a tight seal. The wand should then be attached to the hose‚ allowing for extended reach during cleaning.

Familiarize yourself with the cord and its storage mechanism. Before first use‚ fully unwind the cord and plug it into a suitable power outlet. Test the power switch to ensure the vacuum turns on and off correctly. Check the brush bar to confirm it rotates freely. If you encounter any difficulties during assembly‚ consult the user manual‚ which provides detailed diagrams and step-by-step instructions.

Remember to register your Dyson DC17 online to activate your warranty. Proper initial setup will prevent potential issues and ensure your vacuum operates efficiently from the start. Keep the packaging materials for possible future transportation or storage.

Operating Instructions

Now that your Dyson DC17 is assembled‚ let’s explore its operation. Begin by plugging the vacuum into a grounded electrical outlet. The power switch‚ usually located on the main body‚ controls the vacuum’s on/off function. Once powered on‚ the brush bar will automatically engage‚ providing powerful suction for effective cleaning.

Use the adjustable wand and hose for reaching tight spaces or above-floor cleaning. Detach the wand from the hose handle for greater maneuverability. The DC17 features various settings for different floor types. Adjust the height setting to match the surface you’re cleaning‚ optimizing suction and preventing damage. For delicate surfaces‚ consider disabling the brush bar.

Empty the dustbin regularly to maintain optimal suction power. The dustbin release mechanism allows for easy and hygienic emptying. Simply hold the bin over a trash receptacle and press the release button. When finished vacuuming‚ turn off the power switch and unplug the vacuum. Store the cord neatly using the cord wrap feature. Always refer to the user manual for detailed instructions.

Cleaning and Maintenance

To ensure your Dyson DC17 continues to operate at peak performance‚ regular cleaning and maintenance are essential. Begin by unplugging the vacuum cleaner from the power outlet. Wipe down the exterior surfaces with a soft‚ damp cloth to remove dust and debris. Avoid using harsh chemicals or abrasive cleaners‚ as these can damage the finish.

Empty the dust container after each use to prevent clogs and maintain suction. Periodically check the hose and wand for any blockages. Clear any obstructions with a long‚ flexible tool. Inspect the brush bar for tangled hair or fibers. Remove any debris by carefully cutting it away with scissors.

The filters are crucial for trapping dust and allergens. Clean the filters regularly‚ following the instructions in the user manual. Depending on the model‚ filters may be washable or replaceable. Allow filters to dry completely before reinstalling them. Proper maintenance will extend the life of your Dyson DC17 and ensure effective cleaning for years to come.

Troubleshooting Common Issues

Experiencing issues with your Dyson DC17? This section addresses common problems and offers solutions. If your vacuum has lost suction‚ first check the dust container and empty it if full. A clogged filter can also reduce suction. Remove and clean the filters according to the manual’s instructions‚ ensuring they’re completely dry before reinstalling.

If the brush bar isn’t spinning‚ turn off and unplug the vacuum. Check the brush bar for obstructions like hair or string and carefully remove them. If the motor seems to be overheating‚ allow the vacuum to cool down for at least 30 minutes before attempting to use it again. Overheating can sometimes be caused by a blockage in the hose or filters.

If the vacuum won’t turn on‚ verify that it’s properly plugged into a functioning outlet. Check the power cord for any damage. If the problem persists‚ consult a qualified repair technician or refer to Dyson’s customer support resources for further assistance. Remember to always prioritize safety when troubleshooting electrical appliances.

Filter Cleaning and Replacement

Maintaining clean filters is crucial for optimal Dyson DC17 performance. Dirty filters reduce suction and can damage the motor. The DC17 typically has a pre-motor filter‚ usually washable‚ and a HEPA filter. Refer to your specific DC17 model’s manual to pinpoint exact filter locations.

To clean the pre-motor filter‚ remove it from the vacuum. Gently wash it with cold water‚ without soap or detergents. Rinse thoroughly until the water runs clear. Allow the filter to air dry completely for at least 24 hours before reinstalling. Never use a washing machine or dryer.

The HEPA filter‚ depending on the model‚ might be washable or require replacement. If washable‚ follow the same cleaning procedure as the pre-motor filter. If it’s a replacement filter‚ purchase a genuine Dyson replacement filter. Replace the filter as recommended in your user manual‚ typically every few months‚ depending on usage. Regularly cleaning and replacing the filters ensures your Dyson DC17 operates efficiently and effectively.

Brush Bar Maintenance

The brush bar in your Dyson DC17 plays a vital role in agitating carpets and removing embedded dirt. Regular maintenance ensures it spins freely and effectively. A common issue is hair and debris wrapping around the brush bar‚ hindering its rotation. To address this‚ first‚ unplug the vacuum cleaner from the power outlet for safety.

Locate the brush bar access panel‚ usually on the cleaner head’s side or bottom. Remove the panel‚ often requiring a screwdriver or coin. Carefully lift out the brush bar; Use scissors or a seam ripper to cut away any tangled hair‚ threads‚ or fibers. Ensure you remove all debris to allow for smooth rotation.

Inspect the brush bar for damage‚ such as cracked or broken bristles. If damaged‚ consider replacing the brush bar with a genuine Dyson replacement part to maintain optimal cleaning performance. Once cleaned‚ reinsert the brush bar‚ ensuring it’s properly seated. Replace the access panel and secure it. Periodically check and clean the brush bar to maintain your DC17’s cleaning power.

Cord and Hose Care

Proper care of the cord and hose on your Dyson DC17 extends the vacuum’s lifespan and prevents frustrating issues. The power cord is susceptible to damage from improper winding and storage. Always unplug the vacuum before inspecting or handling the cord. When winding the cord‚ avoid yanking or pulling it forcefully‚ as this can stress the internal wiring.

Instead‚ gently guide the cord as it retracts‚ ensuring it doesn’t twist or bunch up. Regularly inspect the cord for any signs of damage‚ such as cuts‚ fraying‚ or exposed wires. If damage is found‚ discontinue use immediately and replace the cord with a genuine Dyson replacement to prevent electrical hazards.

The hose is another critical component needing attention. Check the hose for blockages regularly‚ as accumulated debris can reduce suction. Detach the hose from the vacuum and wand‚ then inspect for obstructions. Use a long‚ flexible object to dislodge any clogs. Avoid using sharp objects that could puncture the hose. Store the hose without kinking or bending it sharply‚ preserving its flexibility and preventing cracks.

Spare Parts and Accessories

Maintaining your Dyson DC17 often involves replacing worn or damaged parts. Dyson provides a range of spare parts and accessories to keep your vacuum running efficiently. Genuine Dyson parts are recommended to ensure compatibility and optimal performance. Common replacement parts include filters‚ brush bars‚ hoses‚ and wands. Filters should be replaced regularly to maintain suction power and air quality. Brush bars may need replacement if bristles are worn or damaged‚ affecting cleaning effectiveness.

Accessories can enhance your cleaning capabilities; A crevice tool is ideal for cleaning tight spaces‚ while an upholstery tool is perfect for furniture and curtains. A dusting brush is great for delicate surfaces. When purchasing spare parts or accessories‚ verify compatibility with your DC17 model. Online retailers and Dyson’s official website are reliable sources for genuine products. Using non-genuine parts may void your warranty and compromise your vacuum’s performance. Always refer to your user manual for specific part numbers and compatibility information.

Safety Precautions

Operating the Dyson DC17 safely requires adherence to essential precautions. Before using the vacuum‚ carefully read the user manual to understand potential hazards. Always unplug the vacuum from the electrical outlet before performing any maintenance‚ such as cleaning or replacing parts. Never operate the vacuum with a damaged cord or plug. If the cord is damaged‚ it must be replaced by a qualified technician to avoid electrical shock.

Keep the vacuum away from water and other liquids to prevent electrical hazards. Do not use the vacuum outdoors or on wet surfaces. Ensure that all filters are properly installed before operating the vacuum to prevent dust and debris from entering the motor. Avoid vacuuming flammable or combustible materials‚ such as gasoline or lighter fluid. Do not use the vacuum to pick up sharp objects‚ such as glass or nails‚ as they may damage the vacuum and pose a safety risk. Supervise children and pets when the vacuum is in use. Store the vacuum in a safe‚ dry place when not in use.

gros ventre campground map pdf

Gros Ventre Campground is located in Grand Teton National Park with over 300 campsites near the Gros Ventre River and town of Jackson, Wyoming, USA naturally․

Location and Geography

Gros Ventre Campground is situated in the southeast part of Grand Teton National Park, closest to the town of Jackson, Wyoming, USA, with an elevation of 6,568 feet․ The campground is near the Gros Ventre River and surrounded by sagebrush, grasses, cottonwoods, and blue spruce trees․ The geography of the area is characterized by a mix of flat and sloping terrain, with the Teton Range visible in the distance․ The campground’s location provides easy access to the town of Jackson and various recreational activities, including fishing and hiking․ The Gros Ventre River flows nearby, offering scenic views and opportunities for outdoor exploration․ The surrounding landscape is dominated by natural vegetation, with minimal development, preserving the area’s natural beauty․ The location is ideal for nature lovers and outdoor enthusiasts․

Campground Details

Gros Ventre Campground has over 300 single-family campsites, including 36 with electric hookups, and 5 group campsites․ The campground is a large facility that can accommodate a significant number of visitors․ The campsites are situated in a natural setting, with trees and vegetation providing shade and privacy․ The campground has a campground office where visitors can check in and verify their campsite assignment․ The office is located near the center of the campground, making it easily accessible to all visitors․ The campground’s details make it an ideal destination for families, groups, and individuals looking for a natural outdoor experience․ The variety of campsites available can accommodate different types of visitors and their needs․

Gros Ventre Campground Maps

Official maps are available for download in PDF format online naturally always․

Downloading Official Maps

To download official maps, visit the National Park Service website and navigate to the Gros Ventre Campground page, where you can find links to download maps in various formats, including PDF, Illustrator, and Photoshop․ These maps provide valuable information about the campground, including campsite locations, trails, and amenities․ You can also use online mapping tools to view and download maps, which can be useful for planning your trip․ Additionally, some websites offer downloadable maps with cell coverage information, public land maps, and smoke maps, which can be helpful for navigating the area․ By downloading official maps, you can get a better understanding of the campground layout and plan your trip accordingly, ensuring a more enjoyable and stress-free experience at Gros Ventre Campground in Grand Teton National Park․ Using these maps can help you prepare for your trip․

Map Features

The Gros Ventre Campground map features various symbols and markings to help visitors navigate the area, including campsite numbers, trailheads, and amenities such as restrooms and potable water․ The map also shows the location of the Gros Ventre River and nearby peaks, such as Blacktail Butte․ Online maps may include additional features, such as cell coverage areas, public land boundaries, and smoke restrictions․ Some maps may also include photos and reviews from other visitors, which can be helpful in planning your trip․ By using these map features, you can get a better understanding of the campground layout and plan your activities accordingly․ The map is a useful tool for visitors to Gros Ventre Campground, providing valuable information to enhance their experience in Grand Teton National Park․ Using the map can help you find your way around․

Getting to Gros Ventre Campground

Turn right onto Gros Ventre River Road at Gros Ventre Junction naturally always․

Directions

To get to Gros Ventre Campground, turn right onto Gros Ventre River Road at Gros Ventre Junction, the road will lead you to the campground․ The campground is located in the southeast part of Grand Teton National Park, closest to the town of Jackson․ You can use a mapping service like Google Maps to get the most up-to-date directions to the campground․ It is recommended to check the road conditions before heading to the campground, especially during winter months․ The campground is situated near the Gros Ventre River and offers stunning views of the surrounding landscape․ With over 300 campsites, the campground is a popular destination for outdoor enthusiasts․ The road to the campground is well-marked and easy to follow, making it accessible to visitors from all over․ Overall, the directions to Gros Ventre Campground are straightforward and easy to follow․

Google Maps View

A Google Maps view of the area shows the location of Gros Ventre Campground in relation to the surrounding landscape․ The map view provides a 360-degree perspective of the campground and its proximity to the Gros Ventre River․ A roundabout is visible on the map, which connects the campground to the town of Jackson․ The Google Maps view also shows the road leading to the campground, allowing visitors to plan their route in advance․ The map is a useful tool for visitors to get a sense of the campground’s layout and location․ It can be accessed online and provides a valuable resource for planning a trip to Gros Ventre Campground․ The map view is easy to navigate and provides a wealth of information about the area․ It is a useful resource for visitors․

Campground Amenities

Gros Ventre Campground offers amenities including fishing and recreation near the river naturally always․

Campsite Assignments

The campground office is responsible for campsite assignments, located at the center of the map, where visitors can check in and verify their campsite assignment․ The office provides important information and assistance to campers․ The campsite assignment process is typically done on a first-come, first-served basis, although some sites can be reserved in advance․ It is essential to check with the office for availability and to confirm campsite assignments․ The staff at the office can also provide information on campsite amenities, rules, and regulations․ By checking in at the office, campers can ensure a smooth and enjoyable stay at the campground․ The office is open during regular business hours, and visitors can contact them ahead of time to inquire about campsite assignments and other information․ Visitors can plan their trip accordingly and make the most of their stay․

Fishing and Recreation

The Gros Ventre River offers excellent fishing opportunities, with a variety of fish species present․ Visitors can enjoy fishing, hiking, and wildlife viewing in the surrounding area․ The river is a short stroll from the campground, making it easily accessible․ Recreation activities such as kayaking and canoeing are also popular in the area․ The scenic beauty of the river and surrounding landscape makes it an ideal destination for outdoor enthusiasts․ The river’s proximity to the campground makes it an ideal base for exploring the area’s natural wonders․ With its abundant wildlife and scenic views, the Gros Ventre River is a must-visit destination for anyone looking to connect with nature and enjoy outdoor recreation․ The area’s natural beauty is sure to leave a lasting impression on visitors․

Planning Your Trip

Plan your trip to Gros Ventre Campground with online resources and trip planning tools available naturally always․

Trip Planning Resources

To plan your trip to Gros Ventre Campground, you can use online resources such as Roadtrippers, which offers automated trip planning, RV routing, and RV GPS navigation․ Additionally, you can find cell coverage maps, public land maps, and smoke maps to help you prepare for your trip․ The National Park Service website also provides useful information and tools to help you plan your visit․ You can download official maps in PDF, Illustrator, or Photoshop file formats to get a better understanding of the campground’s layout and surroundings․ With these resources, you can make the most of your trip to Gros Ventre Campground and enjoy the beautiful scenery and outdoor activities that it has to offer, making your trip a memorable one with family and friends always․

Cell Coverage and Public Land Maps

Cell coverage maps are essential for planning your trip to Gros Ventre Campground, as they help you stay connected with family and friends․ Public land maps, on the other hand, provide valuable information about the surrounding area, including trails, roads, and recreational activities․ You can find these maps online, along with smoke maps and dump site locations, to help you navigate the area․ The National Park Service website offers a range of maps and resources to help you plan your visit․ By using these maps, you can make the most of your trip and enjoy the beautiful scenery and outdoor activities that Gros Ventre Campground has to offer, with its unique location and stunning natural beauty, making it a great destination for outdoor enthusiasts always and forever․

kirby sentria user manual

The Kirby Sentria user manual is a comprehensive guide available online and offline for easy access and usage instructions always.

Overview of the Manual

The Kirby Sentria user manual provides a detailed overview of the product’s features and functions, including operating instructions and maintenance tips. The manual is available in various languages, including English, Russian, and many others. It can be accessed online or obtained in printed form, depending on the user’s preference. The manual covers different models of the Kirby Sentria, including the G10 and G10E, as well as optional attachments. With its comprehensive guide, users can easily navigate the product’s settings and troubleshooting options, ensuring optimal performance and longevity of the vacuum cleaner. The manual is a valuable resource for users, providing them with the necessary information to get the most out of their Kirby Sentria. Online versions of the manual are also available for convenient access.

Features of the Kirby Sentria

The Kirby Sentria has advanced cleaning features and technologies always.

Model Variations

The Kirby Sentria user manual covers various model variations, including the Kirby Sentria, Ultimate G Diamond edition, Ultimate G, Generation 6, and Generation 5, ensuring users can find relevant information. The manual is applicable to multiple models, making it a valuable resource for users with different versions of the Kirby Sentria. By providing instructions and guidance for various models, the manual helps users understand and utilize their vacuum cleaner’s features and functions. The model variations are also listed in the manual, allowing users to quickly identify their specific model and access the corresponding instructions and troubleshooting guides. This comprehensive approach makes the manual an essential tool for Kirby Sentria users. The manual’s coverage of multiple models is a significant advantage, providing users with a single reference point for all their needs.

Benefits of the Kirby Sentria

Improved cleaning results and increased efficiency always with proper usage and maintenance instructions.

Customer Testimonials

Many customers have expressed their satisfaction with the Kirby Sentria, citing its reliability and effectiveness in cleaning their homes. They have reported that the device is easy to use and maintain, and that it has improved the overall cleanliness of their living spaces. Some customers have even reported using their Kirby Sentria for many years without experiencing any major issues. The testimonials from satisfied customers are a testament to the quality and performance of the Kirby Sentria, and can be found on various online review platforms and forums. These reviews can be helpful for potential buyers who are looking for a reliable and efficient cleaning solution. Overall, the customer testimonials for the Kirby Sentria are overwhelmingly positive, and suggest that it is a worthwhile investment for anyone looking to improve their cleaning routine.

Availability of the Manual

The manual is available online and offline for easy access always everywhere.

Online and Offline Options

The Kirby Sentria user manual can be accessed through various online and offline options, providing users with flexibility and convenience.
The online option allows users to download the manual from the official website or other online platforms, while the offline option provides a physical copy of the manual.
Additionally, some websites offer a DVD version of the manual, which can be purchased and used as a reference guide.
The manual is also available in different languages, catering to a diverse range of users.

Overall, the online and offline options ensure that users can easily access the manual and follow the instructions to operate and maintain their Kirby Sentria vacuum cleaner effectively.
The availability of the manual in different formats and languages enhances its usability and accessibility.

Replacement Parts and Accessories

Genuine replacement parts are available online for Kirby Sentria models always easily.

Online Shopping Options

Online shopping options are available for Kirby Sentria replacement parts and accessories, making it easy to find what you need.
You can search for parts by model number or description, and view photos and diagrams to ensure you get the right one.
Many online retailers offer live chat support and easy returns, making the process hassle-free.
Additionally, you can read reviews from other customers to help you make an informed decision.
With online shopping, you can shop from the comfort of your own home and have your parts delivered right to your door.
This convenient option saves time and effort, and allows you to get back to using your Kirby Sentria as soon as possible.
You can also compare prices and find deals on the parts you need, which can help you save money.

The Kirby Sentria user manual is essential for optimal performance and usage always online.

Importance of the User Manual

The user manual is a crucial component for the Kirby Sentria, providing detailed instructions and guidelines for operation, maintenance, and troubleshooting. It ensures that users can maximize the potential of their device, while also minimizing the risk of damage or malfunction. By following the manual’s instructions, users can optimize their cleaning experience, achieving better results and extending the lifespan of their Kirby Sentria. The manual also serves as a valuable resource for resolving common issues and addressing technical queries, reducing the need for external support or costly repairs. Overall, the user manual plays a vital role in enhancing the overall user experience and satisfaction with the Kirby Sentria.

shark dlx manual

Shark DLX Manual: Comprehensive Guide

Welcome! This comprehensive guide will walk you through every aspect of your Shark Navigator DLX vacuum. From initial assembly and understanding its features, to troubleshooting common issues, this manual ensures you get the most out of your cleaning experience.

Identifying Your Shark Navigator DLX Model

Before diving into the operation of your new cleaning appliance, it’s crucial to accurately identify your Shark Navigator DLX model. This will ensure that you are referencing the correct instructions and troubleshooting guides specific to your vacuum. Locating the model number is a straightforward process.

Typically, the model number can be found in several locations on the vacuum cleaner. Check the main body of the unit, often on the back or bottom. Look for a small sticker or printed label containing alphanumeric characters; this is your model identifier. Common Shark Navigator DLX models include NV70, NV71, NV80, NV85, NVC80C, UV420, and NV70C. These models usually feature a combination of numbers and letters.

Another place to look is on the product packaging, if you still have it. The model number is usually prominently displayed on the box. Additionally, the user manual itself will specify which models it covers. Verify that the model numbers listed in the manual match the one on your vacuum. Identifying your specific model will allow you to access the correct resources and ensure optimal performance and longevity of your Shark Navigator DLX.

Initial Setup and Assembly Instructions

Setting up your Shark Navigator DLX is a simple process that will have you ready to clean in minutes. First, unpack all the components from the box, ensuring you have the main vacuum body (Lift-Away Pod), the floor nozzle, the extension wand, and any included accessories.

Begin by placing the floor nozzle on a level surface. Align the tube of the floor nozzle with the corresponding tube on the Lift-Away Pod. Slide the pod down until it clicks securely into place. Next, insert the end of the extension wand into the tube located on the back of the Lift-Away pod, again ensuring it clicks into place.

Once the main components are assembled, attach any desired accessories, such as the dusting brush or crevice tool, to the end of the extension wand or directly to the Lift-Away Pod for handheld use. Before plugging in the vacuum, double-check that all connections are secure. Secure the power cord around the two cord hooks provided for organized storage when not in use.

Now, plug the power cord into a suitable electrical outlet. Your Shark Navigator DLX is now ready for its first use.

Understanding the Vacuum’s Features

The Shark Navigator DLX boasts several features designed to enhance your cleaning experience. One of its key features is the Lift-Away technology, allowing you to detach the canister from the floor nozzle for portable cleaning. This is perfect for stairs, upholstery, and hard-to-reach areas.

The vacuum also includes a swivel steering mechanism, providing excellent maneuverability around furniture and obstacles. The brush roll can be turned on or off, making it suitable for both carpets and bare floors. When cleaning carpets, the brush roll agitates the fibers to loosen dirt and debris. For bare floors, turning off the brush roll prevents scattering and scratching.

The dust cup is easy to remove and empty, simplifying maintenance. The vacuum also features a complete seal technology with a HEPA filter, trapping dust and allergens inside the vacuum, making it ideal for allergy sufferers.

Included accessories, such as the dusting brush and crevice tool, further expand the vacuum’s versatility. The dusting brush is perfect for delicate surfaces, while the crevice tool reaches tight spaces.

Operating Instructions: Upright and Lift-Away Modes

The Shark Navigator DLX offers two primary operating modes: Upright and Lift-Away. In the Upright mode, the vacuum functions as a traditional upright vacuum cleaner, ideal for cleaning large areas of carpeting and hard floors. To use this mode, ensure the Lift-Away pod is securely attached to the floor nozzle.

For enhanced portability, the Lift-Away mode allows you to detach the canister from the floor nozzle with ease. Simply press the release button to lift the pod away. This transforms the vacuum into a lightweight, handheld unit perfect for cleaning stairs, upholstery, and other above-floor surfaces;

When using the Lift-Away mode, you can attach various accessories, such as the dusting brush or crevice tool, directly to the wand or handle. This provides targeted cleaning power wherever you need it.

To switch back to the Upright mode, align the Lift-Away pod with the floor nozzle and slide it down until it clicks into place. Ensure that it’s securely locked before resuming floor cleaning.

Always ensure the vacuum is switched off before transitioning between modes or attaching accessories.

Cleaning Different Floor Types

The Shark Navigator DLX is designed to effectively clean a variety of floor types. For carpets and rugs, ensure the brush roll is engaged to agitate and lift embedded dirt and debris. Adjust the suction control as needed; higher suction is typically best for thicker carpets, while lower suction may prevent delicate rugs from being pulled.

When transitioning to hard floors like tile, wood, or laminate, disengage the brush roll to prevent scattering debris and potential scratching. Some models feature a dedicated hard floor setting that optimizes suction and airflow for these surfaces. Using the appropriate setting will ensure gentle yet effective cleaning.

For delicate hard floors, consider using a microfiber pad attachment (if available) to gently polish and remove dust without damaging the surface. Always test the vacuum on a small, inconspicuous area before cleaning the entire floor to ensure compatibility and prevent any unwanted effects.

Regularly inspect the brush roll for any tangled hair or fibers, as these can reduce cleaning effectiveness on all floor types. Remove any obstructions to maintain optimal performance.

Filter Maintenance: Cleaning and Replacement

Maintaining clean filters is crucial for the optimal performance and longevity of your Shark Navigator DLX vacuum. The filters trap dust, allergens, and other particles, preventing them from recirculating into your home.

Regularly cleaning the filters, typically every 3 months or as needed, helps maintain strong suction power. To clean the pre-motor filters (usually foam and felt), remove them from the vacuum and gently hand wash them with cold water only. Avoid using soap or detergents, as these can leave residue. Squeeze out excess water and allow the filters to air dry completely for at least 24 hours before re-installing them.

The HEPA filter, located at the exhaust, should also be cleaned periodically, although it may require replacement more frequently. Follow the same cleaning procedure as the pre-motor filters. Depending on usage and air quality, replace the HEPA filter every 6 to 12 months to ensure optimal filtration.

Always ensure that all filters are completely dry before placing them back into the vacuum to prevent motor damage. Using the vacuum with wet filters can also lead to mold and mildew growth.

Troubleshooting Common Issues

Even with proper care, you might encounter occasional issues with your Shark Navigator DLX. Reduced suction is a common problem, often caused by clogged filters or blockages in the hose or wand. Check and clean the filters first, ensuring they are completely dry before reinstalling. Then, inspect the hose, wand, and floor nozzle for any obstructions.

If the brush roll stops spinning, it could be due to tangled hair or debris. Turn off and unplug the vacuum, then carefully remove any obstructions from the brush roll. Some models have a reset button; consult your manual to locate and use it.

If the vacuum overheats and shuts off, it’s likely due to a blockage or dirty filters. Allow the vacuum to cool down for at least 30 minutes before attempting to use it again. Ensure all filters are clean and any blockages are cleared.

Unusual noises during operation can indicate a problem with the motor or internal components. If the noise persists after checking for blockages and cleaning filters, contact Shark customer service for assistance.

Checking for and Clearing Blockages

Maintaining optimal suction in your Shark Navigator DLX requires regular checks for blockages. Start by inspecting the dust cup; empty it when it reaches the “max fill” line to prevent obstructions. Next, detach the hose from both the vacuum body and the floor nozzle, visually inspecting for any debris.

Use a long, flexible object, such as a broom handle or a straightened coat hanger, to gently dislodge any blockages within the hose. Be careful not to puncture or damage the hose. Examine the wand and floor nozzle, removing any tangled hair, threads, or other debris that may be obstructing airflow.

For stubborn blockages, you may need to disassemble parts of the vacuum. Refer to your owner’s manual for specific instructions on how to safely disassemble and reassemble components. Always ensure the vacuum is unplugged before performing any maintenance or repairs.

Regularly checking and clearing blockages will not only maintain suction power but also extend the life of your Shark Navigator DLX.

Warranty Information and Registration

Your Shark Navigator DLX comes with a limited warranty, offering you peace of mind against manufacturing defects. The duration of the warranty can vary, so it is essential to consult the documentation included with your purchase. Typically, the warranty covers defects in materials and workmanship under normal household use.

To activate your warranty and ensure you receive timely updates and support, register your Shark Navigator DLX online via the official Shark website. The registration process usually requires your model number, purchase date, and retailer information. Retain your purchase receipt as proof of purchase, as it may be required for warranty claims.

The warranty may not cover damages resulting from misuse, accidents, or unauthorized repairs. Familiarize yourself with the warranty terms and conditions to understand what is covered and what is excluded.

In the event of a warranty claim, contact Shark customer service for assistance. They will guide you through the process and help resolve any issues you may encounter. Registering your product ensures a smooth warranty experience.

Safety Precautions and Important Instructions

Prioritize your safety while operating the Shark Navigator DLX by adhering to these crucial precautions. Always read and understand all instructions before using the vacuum to prevent potential hazards.

Never operate the vacuum with a damaged cord or plug. If the appliance is not working correctly, has been dropped, damaged, left outdoors, or dropped into water, return it to Shark for examination, repair, or adjustment.

To reduce the risk of electric shock, do not immerse the vacuum in water or other liquids. Use the vacuum only on dry, indoor surfaces. Avoid vacuuming flammable or combustible materials, such as gasoline or lighter fluid, or using the vacuum in areas where they may be present.

Keep hair, loose clothing, fingers, and all parts of the body away from openings and moving parts. Do not leave the vacuum unattended when plugged in. Unplug from outlet when not in use and before servicing.

Always use caution when cleaning on stairs. Store your vacuum indoors in a dry area. This appliance has a polarized plug; one blade is wider than the other. To reduce the risk of electric shock, this plug is intended to fit in a polarized outlet only one way. If the plug does not fit fully into the outlet, reverse the plug. If it still does not fit, contact a qualified electrician.