Brother P-Touch User Guide: A Comprehensive Overview (Updated 03/26/2026)
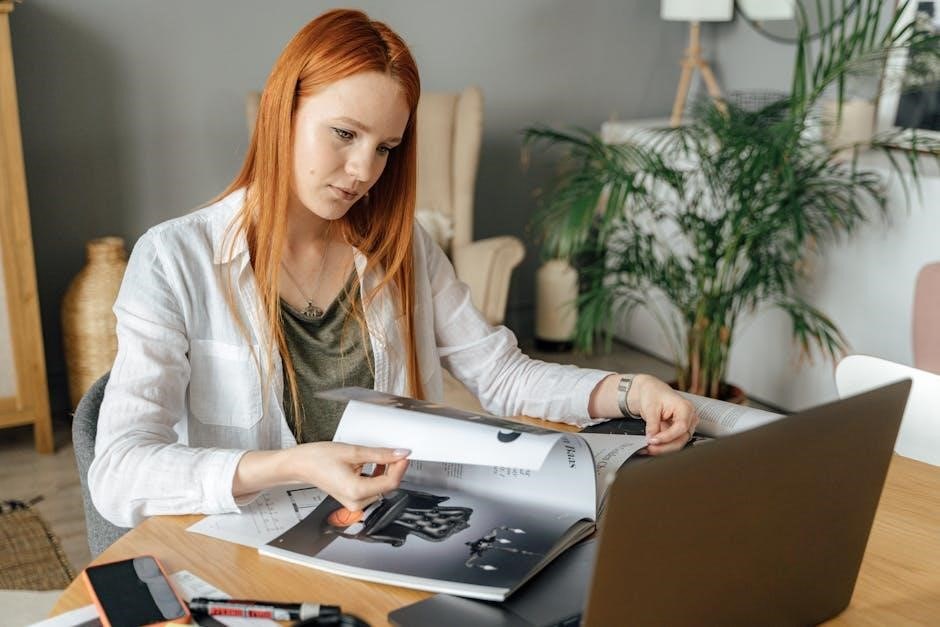
This guide details the Brother P-Touch labeling system, specifically models like the PT-45, allowing users to print up to nine identical label copies efficiently.
Brother P-Touch label makers are versatile tools designed for a multitude of organizational and identification needs. From home offices to industrial settings, these devices offer a convenient way to create durable, professional-looking labels. The P-Touch series has evolved significantly, with models like the PT-45 representing a balance of affordability and functionality.
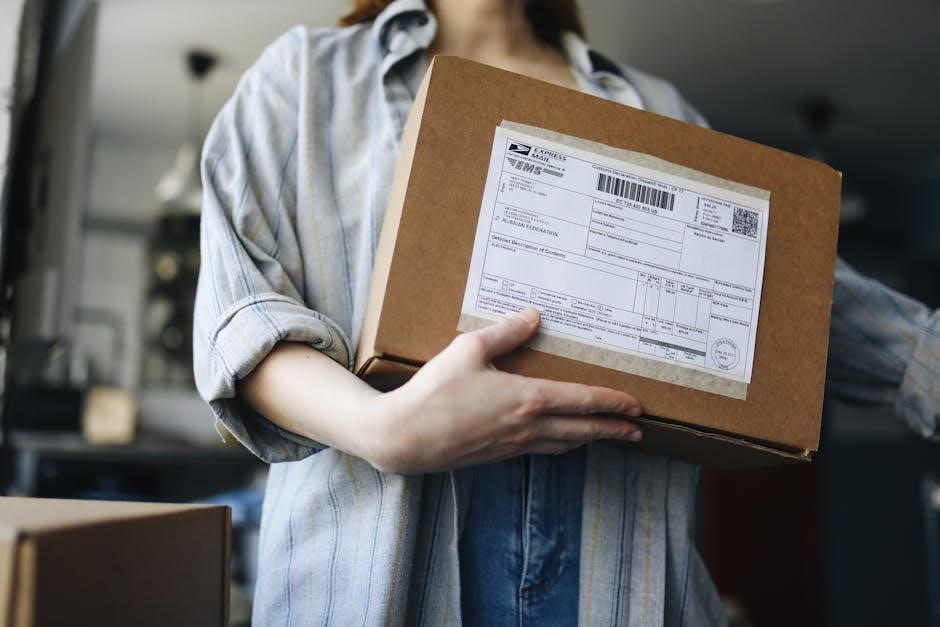
These electronic labeling systems empower users to easily print labels for various applications, including file folders, storage boxes, cables, and more. A key feature across many models is the ability to produce multiple copies of the same label – up to nine, as noted in recent documentation – streamlining repetitive labeling tasks. Always allow the labeler to cool before handling to prevent potential damage.
Understanding P-Touch Models (PT-45 & Beyond)
The Brother P-Touch lineup extends far beyond the foundational PT-45 model, offering a spectrum of features and capabilities. While the PT-45 provides a reliable entry point for basic labeling needs, subsequent models introduce enhancements like larger displays, expanded font choices, and connectivity options. Newer generations often support printing directly from computers or mobile devices.
Regardless of the specific model, a core function remains consistent: the ability to efficiently create and print labels. The PT-45, for example, allows for up to nine identical label copies per print job. Understanding your model’s specific features, as detailed in its user guide, is crucial for maximizing its potential and ensuring optimal performance. Remember to allow cooling time after use.
What’s Included in the Box?
Upon opening your Brother P-Touch package, you should find several key components. Primarily, the box contains the P-Touch label maker unit itself, ready for setup. A starter TZe tape cassette is typically included, allowing you to begin labeling immediately. You’ll also receive a user guide, providing detailed instructions on operation and troubleshooting.
Depending on the model, additional items may be present, such as an AC adapter for powered operation, a USB cable for computer connectivity, or a warranty card. Carefully verify all contents against the packing list to ensure everything is accounted for. Retain the packaging for potential future transport or warranty claims.
Setting Up Your P-Touch Label Maker
Initial setup is straightforward. First, insert the batteries (if not using the AC adapter) following the polarity markings inside the battery compartment. Next, install the TZe tape cassette – ensure it clicks securely into place. Power on the device using the power button. The display will prompt you to configure initial settings, such as language and date/time.
If connecting to a computer, install the necessary P-Touch software from the provided CD or download it from the Brother support website. Follow the on-screen instructions to complete the software installation and establish a connection via the USB cable. Your P-Touch is now ready for labeling!

Getting Started: Basic Operations
Begin by powering on your P-Touch and navigating the intuitive display. Load a TZe tape, select desired fonts, and create your first label easily.
Powering On and Initial Settings
To begin, locate the power button on your Brother P-Touch label maker – its position varies slightly depending on the model. Press and hold the power button until the display illuminates. Upon initial startup, you may be prompted to select your preferred language and date/time format.

Navigate these settings using the directional buttons and confirm your selections with the ‘OK’ or ‘Enter’ button. Some models may also ask you to specify the label length unit (inches or millimeters). Ensure these initial settings are accurate for optimal performance and a personalized user experience. Remember to avoid touching the labeler while it’s cooling down after use.
Loading the TZe Tape Cassette
Begin by lifting the cassette cover on your Brother P-Touch. Gently insert the TZe tape cassette into the compartment, ensuring it clicks securely into place. The tape should unwind smoothly from the cassette. Verify the tape is feeding correctly by manually turning the tape wheel – it should rotate without resistance.
Proper tape loading is crucial for preventing jams and ensuring clear, consistent prints. Always use genuine Brother TZe tapes for optimal performance and to avoid damaging the printhead. After loading, close the cassette cover firmly. Avoid touching the labeler during cooling periods to prevent potential issues with the tape mechanism.
Navigating the P-Touch Display

The P-Touch display utilizes a clear, intuitive interface. Typically, you’ll find buttons for power, print preview, font selection, and editing functions. Use the directional buttons to scroll through menus and options. The ‘OK’ or ‘Enter’ button confirms your selections.
Familiarize yourself with the display icons – they represent features like bolding, underlining, and symbol insertion. Pressing the ‘Shift’ key often unlocks additional characters and functions. The display also shows remaining tape length and battery status. Experiment with the buttons to understand their functions and efficiently create your desired labels.
Selecting Fonts and Styles
Brother P-Touch label makers offer a variety of fonts and styles to personalize your labels. Access the font menu via the display’s navigation buttons. You can typically choose from several built-in fonts, ranging from standard to more decorative options.
Beyond font selection, you can apply styles like bold, italic, underline, and shadow to emphasize text. Some models allow adjusting font size for better readability. Explore the available options to find the perfect combination for your labeling needs. Remember that certain fonts and styles may consume more memory or tape length.

Advanced Features & Functions
Unlock greater labeling potential with templates, symbols, and precise control over label length and quantity, enabling efficient and customized printing solutions.
Creating and Editing Labels
The Brother P-Touch allows for extensive label customization. Begin by entering your desired text using the on-screen keyboard. Utilize the edit functions to correct errors, insert spaces, or modify capitalization. Explore font options to select a style that suits your needs – bold, italic, or underlined text are readily available.
Beyond basic text, incorporate symbols from the built-in library to enhance clarity and visual appeal. Adjust the label layout to center, left-align, or right-align the text. Preview your label before printing to ensure accuracy. For repetitive tasks, save frequently used labels as templates for quick access, streamlining your workflow and maximizing efficiency. Remember to consider the tape width when designing your labels.
Using Templates and Symbols
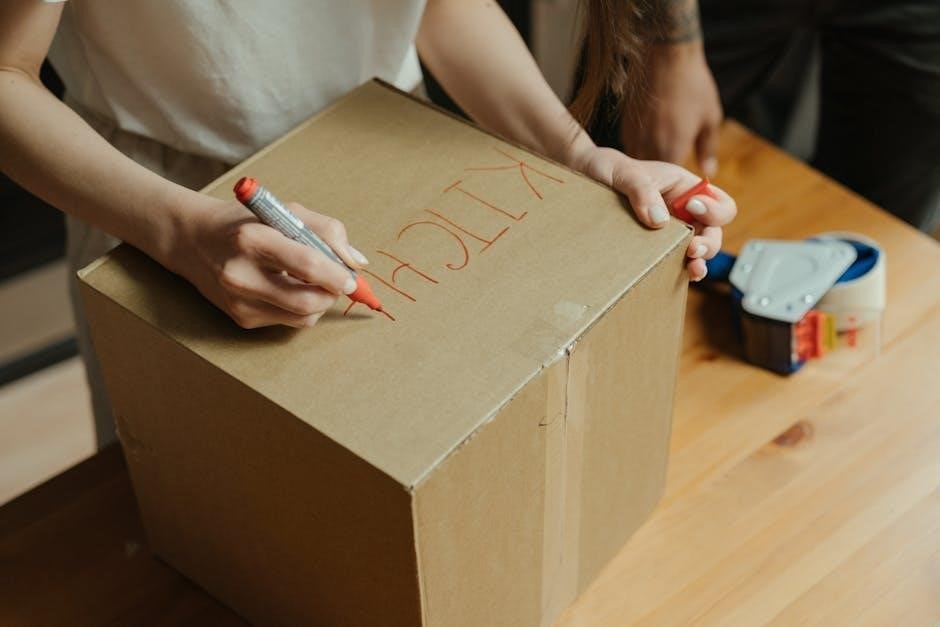
Brother P-Touch label makers offer a variety of pre-designed templates to simplify label creation for common applications like file folders, storage boxes, and cables. Browse the template library directly on the device, selecting a design that fits your purpose. These templates often include pre-formatted text and symbols, saving you time and effort.
Enhance your labels further by incorporating symbols. The P-Touch includes a comprehensive symbol library, accessible through the device’s menu. Add icons to indicate content, highlight important information, or simply add a visual element. Combining templates and symbols allows for professional-looking labels quickly and easily, improving organization and clarity.
Adjusting Label Length and Quantity
The Brother P-Touch allows precise control over label dimensions and the number of copies printed. Access the “Length” setting within the editing menu to customize the label’s size, ensuring it fits your application perfectly. This is crucial for maximizing tape usage and achieving a professional finish.
To print multiple labels, utilize the “Quantity” function. You can print up to nine identical copies of each label with a single command, streamlining tasks like asset tagging or bulk labeling. Remember to verify the available tape length before printing large quantities to avoid interruptions. Efficiently manage your labeling needs with these adjustable settings.

Printing Multiple Copies of Labels
The Brother P-Touch excels at repetitive labeling tasks. After designing your label, easily print multiple copies using the dedicated “Print Quantity” function. This feature allows you to specify the number of identical labels needed, up to a maximum of nine copies per print job, significantly boosting efficiency.
Before initiating a large print run, confirm sufficient tape is loaded to prevent mid-job interruptions. The P-Touch automatically handles the continuous printing process, delivering consistent results with each copy. This capability is ideal for organizing files, labeling storage boxes, or creating price tags in bulk, saving valuable time and effort.

Troubleshooting Common Issues
This section addresses frequent problems like tape jams, display malfunctions, and connectivity concerns, offering solutions to keep your Brother P-Touch functioning optimally.
Tape Jams and Errors
Experiencing a tape jam can interrupt your labeling workflow. First, power off the P-Touch label maker and carefully open the tape compartment. Gently remove any torn tape pieces, avoiding forceful pulling which could damage the mechanism. Ensure the tape cassette is properly seated and that the tape path is clear of obstructions.
If errors persist, consult the display for specific error codes, referencing the full user manual for their meanings. Avoid touching the labeler while it’s cooling down after a jam, as internal components may be warm. Regularly inspect the tape for wrinkles or damage before loading, as these can contribute to jams. Proper tape handling minimizes these issues.
Display Problems and Solutions
If your Brother P-Touch display is blank or exhibiting unusual behavior, begin by ensuring the device has sufficient battery power or is correctly connected to a power source. Try a simple reset by removing and reinserting the batteries, or disconnecting and reconnecting the AC adapter.
If the display remains problematic, check for any error messages displayed, and consult the comprehensive user manual for specific troubleshooting steps related to those codes. Avoid exposing the label maker to extreme temperatures or direct sunlight, as this can affect the LCD. If issues persist, contacting Brother support is recommended for further assistance.
Connectivity Issues (if applicable)
For P-Touch models offering connectivity – typically via USB or Bluetooth – troubleshooting connection problems begins with verifying the cable or pairing status. Ensure the USB cable is securely connected to both the label maker and your computer. For Bluetooth, confirm the device is in pairing mode and discoverable on your computer or mobile device.
Check your operating system for necessary drivers; Brother’s support website provides downloadable drivers for various systems. If pairing fails, try removing the P-Touch from the paired devices list and re-initiating the pairing process. Interference from other wireless devices can sometimes cause issues, so try moving closer to the P-Touch.
Battery Replacement and Power Management
Your Brother P-Touch label maker utilizes batteries for portable operation. When the low battery indicator appears on the display, promptly replace the batteries to avoid data loss during label creation. Use only the recommended battery type (typically AAA or AA alkaline batteries) as specified in your model’s documentation.
To maximize battery life, power off the device when not in use. Avoid mixing old and new batteries, and ensure correct polarity during installation. Some models feature an auto-power-off function to conserve energy; familiarize yourself with this setting. Regularly removing batteries during prolonged storage can prevent potential corrosion and damage.
Tape Types and Compatibility
Brother P-Touch label makers utilize TZe tape options, offering diverse widths and lengths to suit various labeling applications and user preferences effectively.
Understanding TZe Tape Options
Brother’s TZe (Thermal Transfer Zebra) tape is a laminated tape designed for durability and resistance to various environmental factors. It’s available in a wide spectrum of colors, including standard black on white, but also options like black on red, yellow, blue, and even metallic finishes for enhanced visibility and organization.
These tapes aren’t just about aesthetics; they offer practical benefits. The laminated construction makes them resistant to water, chemicals, abrasion, and fading, ensuring labels remain legible over time. Different TZe tape series cater to specific needs – standard tapes for general use, extra-strong adhesive tapes for textured surfaces, and flexible ID tapes for curved applications. Understanding these nuances allows users to select the optimal tape for their specific labeling tasks, maximizing longevity and clarity.
Choosing the Right Tape for Your Needs
Selecting the appropriate TZe tape hinges on the application and environment. For indoor, general-purpose labeling, standard TZe tapes suffice. However, outdoor or industrial settings demand tapes with enhanced durability – consider tapes with stronger adhesives for uneven surfaces or resistance to UV light and extreme temperatures.
Think about visibility too. Brightly colored tapes or metallic options can highlight important information. If labeling cables or wires, flexible ID tapes are ideal. Prioritize laminated tapes for areas exposed to liquids or chemicals. Matching the tape’s properties to the specific requirements ensures long-lasting, legible labels, preventing premature fading or detachment, ultimately saving time and resources.
Tape Widths and Lengths
Brother P-Touch label makers accommodate a variety of TZe tape widths, commonly ranging from 3.5mm to 24mm. Narrower widths (3.5mm, 6mm) are perfect for small items or detailed labeling, while wider tapes (12mm, 18mm, 24mm) offer greater visibility for larger surfaces or prominent identification.
Tape lengths typically come in 8-meter and 26.2-meter cassettes. The choice depends on labeling volume; frequent, large-scale projects benefit from longer tapes, reducing the need for frequent replacements. Consider the P-Touch model’s maximum tape capacity when selecting lengths. Understanding these dimensions ensures optimal label size and efficient tape usage, minimizing waste and maximizing productivity.
Maintenance and Care
Regular cleaning and proper storage extend your P-Touch’s lifespan. Keep both the label maker and tapes protected from dust and extreme temperatures for optimal performance.
Cleaning Your P-Touch Label Maker
To maintain optimal performance, regularly clean your Brother P-Touch label maker. Begin by ensuring the device is powered off and disconnected from any power source. Use a soft, dry cloth to gently wipe down the exterior casing, removing any dust or fingerprints.
For the print head, a slightly dampened (with isopropyl alcohol) cotton swab can carefully remove any accumulated adhesive residue. Avoid excessive moisture, as this could damage internal components. Never use abrasive cleaners or solvents. Pay particular attention to the tape guides and the area around the cutter, as these areas tend to collect debris.
Allow all surfaces to dry completely before reloading tape or powering on the device. Consistent cleaning prevents tape jams and ensures clear, crisp label printing. Remember to avoid touching the P-Touch while it’s cooling down after use.
Storing Your P-Touch and Tapes
Proper storage extends the life of your Brother P-Touch label maker and its tapes. When not in use, store the P-Touch in a cool, dry place, away from direct sunlight and extreme temperatures. Avoid locations with high humidity or dust accumulation.
Tape cassettes should also be stored in a similar environment. Keeping tapes in their original packaging, if possible, helps protect them from moisture and light. Avoid stacking heavy objects on top of the tapes, which could cause damage.
Remember not to touch the P-Touch labeler while it is cooling. Regularly check the storage area for any signs of pests or environmental issues that could affect the equipment.
Firmware Updates (if applicable)
Brother periodically releases firmware updates for certain P-Touch models to improve performance, add features, or address potential issues. Check the Brother Support website regularly for updates specific to your model number. These updates are typically downloaded to a computer and then transferred to the P-Touch via USB connection.
Before initiating an update, ensure your P-Touch has sufficient battery power or is connected to a power adapter. Carefully follow the on-screen instructions provided with the update file. Interrupting the update process can potentially damage the device, rendering it unusable.
Always back up any custom label formats or templates before performing a firmware update, as they may be erased during the process.

Safety Precautions
Avoid touching the P-Touch labeler while it’s cooling down after use to prevent potential burns, and always handle tapes with appropriate care.
Avoiding Damage to the P-Touch
To ensure the longevity of your Brother P-Touch label maker, several precautions should be observed. Never subject the device to extreme temperatures or direct sunlight for extended periods, as this can harm internal components. Avoid dropping the P-Touch, as impacts can damage the display or delicate mechanisms.
Refrain from disassembling the unit beyond recommended maintenance procedures; unauthorized repairs may void any warranty. Keep the P-Touch clean and free from dust and debris. Do not use abrasive cleaners or solvents, opting instead for a soft, dry cloth. Finally, always allow the device to cool completely before handling after prolonged use, preventing potential damage from heat.
Proper Tape Handling
Correct tape handling is crucial for optimal P-Touch performance and label quality. Always store TZe tape cassettes in a cool, dry place, away from direct sunlight, to prevent adhesive degradation. When loading a new cassette, ensure it clicks securely into place. Avoid touching the tape’s adhesive side, as fingerprints or contaminants can affect adhesion.
When peeling labels, do so slowly and evenly to prevent tearing. Discard used tape backing responsibly. Never attempt to reuse a partially used tape cassette, as this can cause jams or printing errors. Regularly inspect tapes for any signs of damage before use, ensuring a clean and professional finish for all your labeling needs.