DonJoy UltraSling 3: Comprehensive Instructions & Guide
DonJoy’s UltraSling 3 provides crucial post-operative immobilization for shoulder injuries, ensuring optimal healing and recovery following procedures like rotator cuff repairs.
This comprehensive guide details proper application, care, and safety precautions for maximizing the benefits of your UltraSling 3.
The DonJoy UltraSling 3 is a premium post-operative shoulder support designed to provide comfortable and secure immobilization following various shoulder procedures. This sling is engineered to aid in the recovery process after rotator cuff repairs, capsular shifts, and Bankhart repairs, as well as glenohumeral dislocations.
Featuring breathable mesh fabric and thermoformed padding, the UltraSling 3 prioritizes patient comfort and compliance. Proper application is vital for effective functioning, and this guide will walk you through each step. It’s crucial to follow your doctor’s specific instructions alongside these guidelines.
The UltraSling 3 is available in standard and ER (Extra Rotational) models, catering to different surgical needs and physician preferences. Understanding your specific model is key to optimal use.
What is the UltraSling 3 Used For?
The DonJoy UltraSling 3 serves as a critical immobilization device following shoulder surgery. Its primary function is to restrict arm movement, protecting the repaired tissues during the initial healing phase. Specifically, it’s frequently prescribed after rotator cuff repairs, stabilizing the shoulder joint and preventing re-injury.
Beyond rotator cuff issues, the UltraSling 3 is also utilized for capsular shifts and Bankhart repairs, providing necessary support during recovery. It’s even suitable for glenohumeral dislocations, ensuring proper alignment and preventing further complications.
The sling’s design promotes healing by minimizing stress on the surgical site, allowing the body’s natural processes to take effect. Proper use, as outlined in these instructions, is paramount for successful rehabilitation.
Indications for Use
The DonJoy UltraSling 3 is medically indicated for post-operative immobilization of various shoulder conditions. Rotator Cuff Repairs benefit significantly from the sling’s support, limiting motion and facilitating tendon healing. Similarly, patients undergoing Capsular Shifts require the sling to maintain shoulder stability post-surgery.
Bankhart Repairs, often performed to address shoulder instability, also necessitate immobilization provided by the UltraSling 3. Furthermore, it’s indicated following procedures for glenohumeral dislocations, aiding in proper joint alignment and preventing recurrent instability.
It’s crucial to adhere to your surgeon’s specific instructions regarding the duration and extent of sling use, as these indications are tailored to individual patient needs.
Rotator Cuff Repairs
Following rotator cuff repair surgery, the DonJoy UltraSling 3 plays a vital role in protecting the repaired tendons during the critical healing phase. Immobilization is paramount to prevent re-injury and ensure successful tendon-to-bone reattachment. The sling restricts arm abduction and external rotation, movements that could compromise the repair.
Patients are typically instructed to wear the UltraSling 3 continuously for a specified period, often several weeks, as directed by their surgeon. Gradual progression of range-of-motion exercises, as prescribed, will be introduced later in the rehabilitation process.
Consistent use of the sling, adhering to the physician’s protocol, is essential for optimal recovery after rotator cuff surgery.
Capsular Shifts
After capsular shift surgery, the DonJoy UltraSling 3 provides necessary immobilization to protect the reconstructed shoulder capsule. This procedure tightens the ligaments surrounding the shoulder joint, stabilizing it and reducing instability. The sling’s primary function is to limit shoulder movement, preventing stress on the healing capsule.
Patients will generally wear the UltraSling 3 for a prescribed duration, often several weeks, to allow the capsule to heal properly. Adherence to the surgeon’s post-operative instructions, including limitations on arm movement, is crucial for a successful outcome.
Proper sling use supports the healing process and minimizes the risk of complications following capsular shift surgery.
Bankhart Repairs
Following a Bankhart repair – a procedure addressing shoulder instability by repairing a labral tear – the DonJoy UltraSling 3 is essential for post-operative immobilization. This surgery restores the labrum, a ring of cartilage that helps stabilize the shoulder joint, preventing dislocations.
The sling restricts arm motion, protecting the repaired labrum during the critical healing phase. Patients are typically instructed to wear the UltraSling 3 for a specific period, often several weeks, depending on the extent of the repair and individual healing progress.
Consistent use, as directed by the surgeon, is vital for optimal recovery and minimizing the risk of re-injury after a Bankhart repair.
Components of the UltraSling 3
The DonJoy UltraSling 3 comprises three key components working together to provide effective shoulder immobilization and patient comfort. First, the Sling Body, constructed from breathable mesh fabric, supports the forearm and distributes weight evenly, reducing pressure points.
Secondly, the adjustable Shoulder Strap allows for customized fit and compression, ensuring secure positioning and preventing slippage. Finally, the Thumb Loop provides additional support and prevents the arm from drifting, maintaining proper alignment.
These components combine to create a lightweight, comfortable, and effective solution for post-operative shoulder care.
Sling Body
The Sling Body of the DonJoy UltraSling 3 is meticulously designed for optimal patient comfort and support during the recovery process. Constructed from a breathable, moisture-wicking mesh fabric, it minimizes heat buildup and skin irritation, promoting airflow and hygiene.
This innovative fabric gently cradles the forearm, distributing weight effectively to reduce pressure on the shoulder and neck. The thermoformed padding further enhances comfort, providing a cushioned support system.
Its lightweight design ensures minimal bulk, allowing for greater freedom of movement while maintaining necessary immobilization.
Shoulder Strap
The Shoulder Strap of the DonJoy UltraSling 3 is a critical component for secure and comfortable immobilization. It’s fully adjustable, allowing for a customized fit that accommodates various body types and ensures optimal support.
This strap is designed to distribute the weight of the arm evenly across the shoulder, reducing strain and discomfort. Constructed from durable, high-quality materials, it provides long-lasting reliability throughout the recovery period.
Proper adjustment of the shoulder strap is essential for maintaining the correct arm position and preventing slippage, contributing to a successful healing outcome.
Thumb Loop
The Thumb Loop on the DonJoy UltraSling 3 plays a vital role in preventing the arm from drifting outward and maintaining proper immobilization. It gently secures the hand, encouraging a natural and comfortable position during the healing process.
This feature is designed to minimize stress on the repaired shoulder joint, promoting optimal recovery. The loop is constructed from soft, yet durable material to prevent skin irritation and ensure patient comfort.
Correctly securing the thumb loop is crucial for maximizing the sling’s effectiveness and preventing unwanted movement of the injured arm.
Proper Application of the UltraSling 3
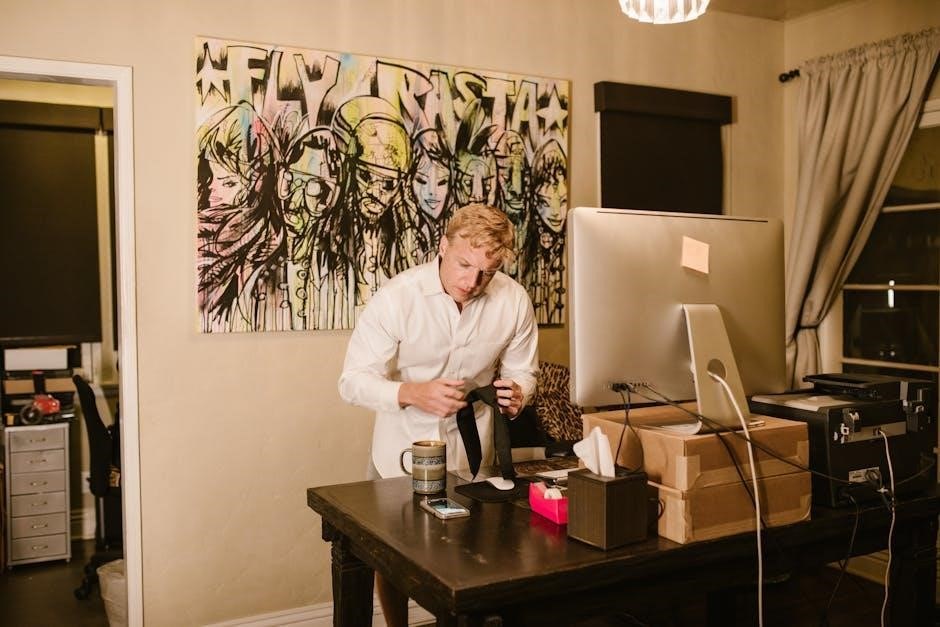
Correct application of the DonJoy UltraSling 3 is paramount for effective immobilization and a successful recovery. Begin by positioning the sling’s body across your back and chest, ensuring the padded section comfortably supports your forearm.
Carefully insert your arm into the sling, keeping your elbow bent at a 90-degree angle. The Thumb Loop should gently cradle your hand, preventing outward rotation. Secure the shoulder strap, adjusting it for a snug, yet comfortable fit.
Always follow your doctor’s specific instructions and refer to the detailed step-by-step guide for optimal results.
Step-by-Step Guide to Wearing the Sling
Step 1: Position the UltraSling 3 with the padded section supporting your forearm and across your back/chest.
Step 2: Gently slide your affected arm into the sling, maintaining a 90-degree elbow bend.
Step 3: Secure your thumb within the Thumb Loop, ensuring it’s comfortably supported and prevents external rotation.
Step 4: Fasten the shoulder strap, adjusting for a secure, yet non-restrictive fit. Avoid overtightening.
Step 5: Double-check the arm support and thumb loop for proper positioning. Consult your physician if adjustments are needed.
Adjusting the Sling for Optimal Fit
Achieving a proper fit with the DonJoy UltraSling 3 is vital for effective immobilization and patient comfort. Begin by ensuring the forearm is adequately supported, with the elbow bent at approximately 90 degrees.
The sling should not dig into the neck or cause undue pressure. Adjust the shoulder strap to distribute weight evenly and prevent slippage.
The Thumb Loop should comfortably support the thumb, preventing external rotation without causing discomfort or restricting circulation.
Regularly check the fit, especially during initial use, and readjust as needed throughout the day.
Adjusting Shoulder Strap
Proper shoulder strap adjustment is key to a comfortable and effective DonJoy UltraSling 3 fit. Locate the adjustment buckle on the shoulder strap. Loosen the strap if it feels too tight, or tighten it if the arm tends to slip forward.
The goal is to position the arm in a neutral position, with the weight distributed evenly across the shoulder. Avoid overtightening, which can restrict circulation and cause discomfort.
Ensure the strap doesn’t dig into the neck or cause pressure points. Fine-tune the adjustment until the arm feels secure and supported.
Adjusting Arm Support
The DonJoy UltraSling 3 offers adjustable arm support to accommodate varying arm lengths and patient needs. Locate the strap connecting the sling body to the forearm cuff. To adjust, gently loosen or tighten this strap, ensuring the elbow remains bent at approximately 90 degrees.
The forearm should be comfortably supported within the sling, without excessive pressure or constriction. Proper positioning prevents the arm from sliding and maintains immobilization.
Avoid over-adjusting, as this could compromise the sling’s support. Regularly check the arm position to ensure continued optimal support throughout recovery.
Securing the Thumb Loop
The thumb loop on the DonJoy UltraSling 3 is crucial for preventing external rotation of the shoulder. Gently insert your thumb through the provided loop, ensuring it’s comfortably positioned without causing discomfort or restricting circulation.
Avoid forcing your thumb into the loop; adjust the sling’s overall fit if needed. The thumb should rest naturally within the loop, not be stretched or strained.
Regularly check that the thumb remains securely positioned, especially during movement. Proper thumb loop engagement contributes significantly to the sling’s effectiveness in maintaining shoulder immobilization during the healing process.
Important Safety Precautions
DonJoy UltraSling 3 safety requires diligent adherence to guidelines. Do not alter the sling in any way, as modifications compromise its intended support and immobilization. Avoid transferring the product to others, as it’s specifically fitted for your individual needs.
Regularly inspect the sling for wear and tear, replacing it if damage is detected. Always follow your physician’s instructions regarding weight-bearing and activity levels while using the sling.
Be mindful of your surroundings to prevent accidental snagging or entanglement. Discontinue use and consult your doctor if you experience increased pain, numbness, or skin irritation.
Do Not Alter the Sling
Crucially, the DonJoy UltraSling 3 must not be altered in any manner. Any modifications – including cutting, sewing, or adding components – will compromise the sling’s structural integrity and its ability to provide proper immobilization. Alterations invalidate the intended support and could hinder the healing process.
The sling is designed with specific dimensions and materials to ensure optimal functionality. Changing these elements can lead to improper fit, discomfort, and potentially, re-injury.
Using a modified sling may also void any warranty associated with the product. Maintain the sling’s original condition for continued safety and effectiveness.
Avoiding Product Transfer
Maintaining hygiene and preventing the spread of potential contaminants is paramount. Therefore, avoid transferring your DonJoy UltraSling 3 to other individuals. This sling is specifically fitted and intended for single-patient use only. Sharing could introduce bacteria or allergens, posing a health risk to another person.
Each patient’s recovery needs are unique, and a shared sling won’t guarantee the correct support or fit for someone else.
Proper sanitation is achieved through careful cleaning, as outlined in the maintenance instructions, but transfer introduces uncontrolled variables. Prioritize personal health and safety by adhering to this guideline.
Cleaning and Maintenance Instructions
Maintaining the cleanliness of your DonJoy UltraSling 3 is vital for hygiene and longevity. Regular cleaning prevents bacterial buildup and ensures optimal comfort. Always hand wash the sling using cold water and a mild soap. Avoid harsh detergents or bleach, as these can damage the materials.
Gently agitate the fabric to remove dirt and debris, then thoroughly rinse to eliminate all soap residue. Air dry the sling completely, away from direct sunlight or heat. Do not machine wash or tumble dry, as this can compromise the sling’s structure and padding.
Hand Washing Instructions
For optimal care of your DonJoy UltraSling 3, hand washing is the recommended cleaning method. Fill a clean basin or sink with cold water and add a small amount of mild soap. Submerge the sling and gently agitate the fabric, focusing on areas with visible dirt or perspiration.
Avoid vigorous scrubbing, which could damage the thermoformed padding or mesh fabric. Once clean, thoroughly rinse the sling under cool, running water until all soap residue is removed. Gently squeeze out excess water – do not wring or twist.
Water Temperature & Soap Type
Maintaining the integrity of your DonJoy UltraSling 3 requires careful attention to water temperature and soap selection during cleaning. Always use lukewarm water; hot water can damage the materials and compromise the sling’s support. Cold water is also acceptable, but may require more agitation for effective cleaning.
Crucially, only employ mild soap. Harsh detergents, bleach, or fabric softeners can degrade the breathable mesh and thermoformed padding, reducing comfort and effectiveness. A gentle, hypoallergenic soap is ideal to prevent skin irritation post-washing.
Comfort Features of the UltraSling 3
DonJoy prioritizes patient comfort with the UltraSling 3’s thoughtfully designed features. The breathable mesh fabric promotes airflow, minimizing heat and moisture buildup during wear, which is essential for extended immobilization periods. This reduces the risk of skin irritation and discomfort.
Furthermore, the sling incorporates thermoformed padding strategically placed to cushion the shoulder and neck areas. This padding conforms to the body’s contours, distributing pressure evenly and enhancing overall comfort. These features contribute significantly to patient compliance and a more positive recovery experience.
Breathable Mesh Fabric
The DonJoy UltraSling 3 utilizes a premium, breathable mesh fabric construction, a key element in maximizing patient comfort during the recovery process. This specialized material allows for continuous airflow, effectively minimizing the build-up of heat and moisture against the skin.
This ventilation is crucial, particularly during prolonged use, as it significantly reduces the likelihood of skin irritation, chafing, and discomfort. The mesh fabric’s lightweight nature also contributes to the sling’s overall comfort, ensuring it doesn’t feel bulky or restrictive. It promotes a more tolerable wearing experience.
Thermoformed Padding
DonJoy UltraSling 3 incorporates strategically placed thermoformed padding to enhance patient comfort and support. This padding is meticulously molded to conform to the natural contours of the shoulder and upper arm, distributing pressure evenly and minimizing concentrated stress points.
The thermoformed design provides a gentle yet firm cushioning effect, reducing the risk of skin breakdown and promoting a more secure and stable fit. This feature is particularly beneficial during the initial stages of recovery when sensitivity is heightened. It contributes to improved patient compliance and overall comfort throughout the healing process.
UltraSling 3 ER Model ─ Specifics
The DonJoy UltraSling 3 ER model is specifically engineered for extended range of motion (ER) rehabilitation protocols post-surgery. It maintains the core features of the standard UltraSling 3 – breathable mesh and thermoformed padding – but includes enhancements for controlled arm movement.
This model allows for a greater degree of external rotation, as prescribed by your physician, facilitating early mobilization and preventing stiffness. Always adhere to your doctor’s instructions regarding the extent of permitted movement. Cleaning instructions remain consistent: hand wash with mild soap in lukewarm water, ensuring thorough rinsing and air drying.
Understanding the UltraSling 3 AB Model
The DonJoy UltraSling 3 AB model, featuring an abduction pillow, is designed to maintain the shoulder in a specific abducted (outwardly rotated) position. This is crucial for certain post-operative protocols, particularly Bankhart repairs and glenohumeral dislocations, promoting optimal healing and stability.
The integrated abduction pillow securely holds the arm in the prescribed angle, preventing unwanted movement. Remember, do not alter the sling in any way or transfer products. Cleaning remains the same: hand wash in cold water with mild soap, rinse well, and air dry. Follow your doctor’s specific instructions for use.
Post-Operative Care with the UltraSling 3
Successful recovery with the DonJoy UltraSling 3 hinges on diligently following your surgeon’s post-operative instructions. This includes wearing the sling as prescribed, typically for several weeks, to protect the healing tissues.
Begin range of motion exercises only when and as directed by your physician. Avoid any activities that cause pain or discomfort. Remember to hand wash the sling with mild soap and lukewarm water to maintain hygiene. Consistent compliance with your doctor’s plan and proper sling care are vital for optimal healing and a return to function.
Following Doctor’s Instructions
Adhering to your doctor’s specific post-operative protocol is paramount when using the DonJoy UltraSling 3. This includes understanding the prescribed duration of sling use, weight-bearing restrictions, and activity limitations.
Do not modify or discontinue sling use without explicit medical approval. Pay close attention to any signs of complications, such as increased pain, swelling, or numbness, and report them immediately. Your surgeon’s guidance ensures proper healing and minimizes the risk of setbacks. Remember, the UltraSling 3 is a tool to aid recovery, best utilized under professional supervision.
Range of Motion Exercises (as prescribed)
Your physician may prescribe specific range of motion (ROM) exercises to perform while wearing the DonJoy UltraSling 3. These exercises are crucial for preventing stiffness and promoting optimal shoulder function during recovery.
Strictly follow the prescribed frequency, duration, and intensity of these exercises. Do not attempt any movements beyond your doctor’s recommendations. Gentle, controlled motions are key; avoid forceful or sudden movements. The UltraSling 3 allows for controlled positioning during exercises, but always prioritize comfort and listen to your body. Consistent adherence to the exercise plan maximizes rehabilitation success.
Potential Complications & Troubleshooting
While the DonJoy UltraSling 3 is designed for comfort and support, potential complications can occur. Skin irritation under the sling or straps is possible; ensure proper hygiene and adjust straps to avoid excessive pressure.
Sling slippage may happen if not correctly adjusted – re-tighten straps and ensure the thumb loop is secure. If pain increases or new symptoms develop, consult your doctor immediately. Do not modify the sling attempting self-repair. Report any discomfort or functional issues to your healthcare provider for prompt evaluation and guidance.
Skin Irritation
DonJoy UltraSling 3 users may experience skin irritation from friction or moisture buildup. Ensure the skin under the sling and straps remains clean and dry. Wear a thin, breathable cotton undershirt to minimize direct contact with the sling’s material.
Adjust the straps to avoid overly tight pressure, which can restrict circulation and exacerbate irritation. If redness, itching, or rash develops, discontinue use and consult your physician. Proper hygiene and a comfortable fit are crucial for preventing skin issues during recovery.
Sling Slippage
DonJoy UltraSling 3 slippage can occur if not properly adjusted or if the arm is moved excessively. Ensure the shoulder straps are securely fastened and appropriately tightened to prevent downward movement. Regularly check the thumb loop’s security, as a loose loop contributes to slippage.
Avoid reaching behind your back or making large arm movements that could dislodge the sling. If persistent slippage occurs despite correct adjustment, consult your healthcare provider. Maintaining proper positioning and adherence to post-operative instructions are vital for preventing unwanted movement and ensuring effective immobilization.
DonJoy UltraSling 3: Materials and Quality
The DonJoy UltraSling 3 is constructed with high-quality materials prioritizing patient comfort and effective immobilization. It features breathable, moisture-wicking mesh fabric to minimize skin irritation and enhance airflow during wear. Thermoformed padding provides crucial cushioning and support, promoting patient compliance.
DonJoy utilizes durable construction techniques to ensure the sling withstands daily use throughout the recovery period. The materials are selected for their lightweight properties, preventing added strain on the injured shoulder. This commitment to quality ensures a reliable and comfortable experience, aiding in optimal healing.
Patient Compliance and Comfort
DonJoy prioritizes patient comfort to encourage consistent use of the UltraSling 3, a key factor in successful recovery. The breathable mesh fabric minimizes heat buildup and skin irritation, while thermoformed padding provides gentle, yet effective, support.
A well-fitting sling, properly adjusted, significantly enhances comfort and reduces the likelihood of slippage. Patient education regarding proper wear and care, as outlined in these instructions, is vital. Consistent use, as directed by a physician, maximizes the immobilization benefits and promotes optimal healing outcomes.
Where to Purchase the DonJoy UltraSling 3
The DonJoy UltraSling 3 is widely available through a variety of medical supply retailers, both online and in physical stores. Patients can often purchase directly from DonJoy’s official website, ensuring authenticity and access to the full product range.
Local pharmacies and durable medical equipment (DME) suppliers frequently stock the UltraSling 3. Online marketplaces like Amazon also carry the product, offering convenience and competitive pricing. It’s recommended to verify the seller’s credentials to guarantee a genuine DonJoy product and proper sizing guidance.